3 Spoon Carving Setups: Beginner, Intermediate and Advanced
Spoon carving is a fantastic hobby. It’s incredibly easy to get started with. It can be done almost anywhere, with a minimum of tools.
Here’s a quick look at what different spoon carving setups might look like.
Beginner
All you need to start spoon carving is a straight knife, a hook knife and spoon blanks. For under $100 you can have a go and see if spoon carving is something you’ll enjoy.
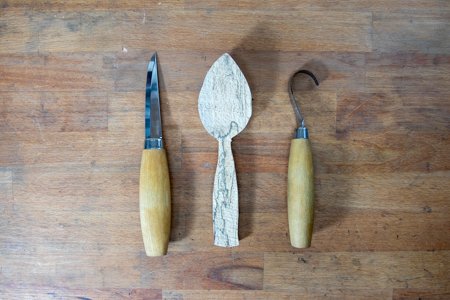
Mora 106, spoon blank and Mora 164
Once you’ve got all that, all you need is a place to sit. I prefer a firm seat you can scoot to the edge of. In that position you’ve got a greater range of motion for your arms. If you’re carving somewhere you don’t want to make a mess, put down a sheet to collect the woodchips and off you go!

Intermediate
After you’ve carved a couple of blanks you might want to move on to tackling the whole process yourself. Add a saw and a carving hatchet to your toolkit and you’ll be able to process logs into spoons yourself.
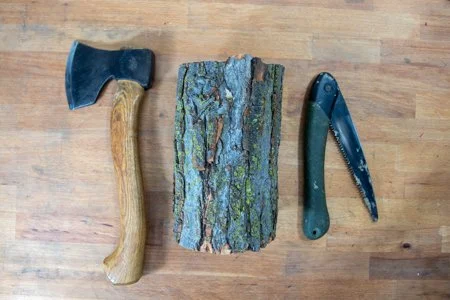
Kalhoff Small Carver, silver maple log and Bahco Laplander
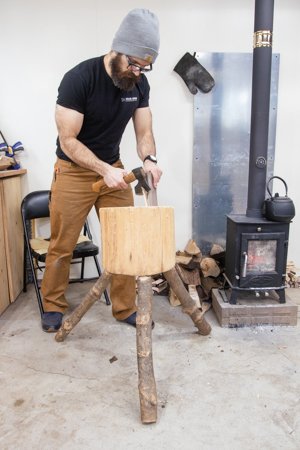
Using a hatchet requires a chopping block. One you can stand at is ideal. The legs pop out of this one quite easily, so it can be easily stored. You could also just use a round of wood without legs and axe while seated.
This is essentially all you need to ace spoon carving. Calling this setup ‘Intermediate’ isn’t entirely accurate in terms of spoon carving skills. You can easily pause tool acquisition here and focus on getting good at the craft.
An easy addition to the toolkit is an adze. This will help speed up hollowing and open the door to larger hollow forms such as cups and bowls. For spoon carving, an adze is used on the same chopping block you do your axe work on.

Advanced
If you want to increase your rate of production I recommend adding a drawknife to your toolkit. This stage is completely optional. You can become an extremely skilled spoon carver without expanding into this area.
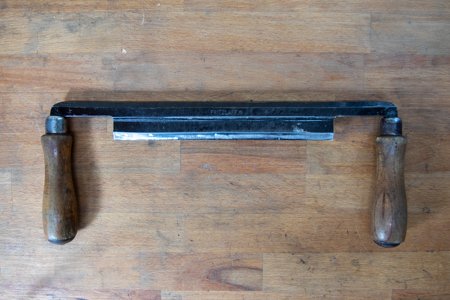
Vintage Pritzlaff drawknife
That said, a drawknife massively helps with my production carving. It’s more powerful than a straight knife but more controlled than the axe.
Just as the axe needs a chopping block, the drawknife needs to be paired with a device that hold the wood. A spoon mule is probably the best holding device out there. A spoon mule is still a pretty compact bit of kit, but requires more space than just a chopping block. It won’t last as long if you store it outside. Fortunately they’re pretty light and this design comes apart easily.

Spoon carving is often referred to as a ‘gateway drug’ to the world of green woodworking. Many spoon carvers have branched out into pole lathe turning, bowl carving and furniture making. Each of which require their own tools and workspaces.
Hopefully this primer into spoon carving setups will help you start carving. And then the rest is up to you!