5 Mistakes Beginner Spoon Carvers Make
Spoon carving is a fantastic hobby to take up. It only needs a few tools to get started, and the raw materials are easily sourced for free. Just the act of creating wood shavings is therapeutic, throw in the bonus of having a useful utensil. and you’ve got an great way to spend your time.
That isn’t to say spoon carving is always sunshine and roses. It can be physically demanding, potentially resulting in blistered hand and sore muscles. Using sharp tools also carries a real risk of injury and the unpredictability of a natural material like wood can be a source of frustration.
I’ve carved a bunch of spoons in my time and still remember the struggles I had when I was starting out. In the many spoon carving workshops I’ve run, my students have come face-to-face with the same issues I first struggled with. There’s a great feeling of accomplishment that comes out of overcoming a problem, and while this list is by no means exhaustive, it goes over some of the most common problems beginners face. Learn to spot these errors and apply correct solutions and your spoon carving experience will become more enjoyable.
Chunky Spoon Blanks
Buying spoon blanks from established makers is the easiest way to get started with spoon carving. At some point though, you’re going to want to start making your own blanks. If you’ve already carved a few blanks made by others, you’ll be able to apply what you’ve learned with the knife work to developing the new skill of processing logs into your own blanks. Using wood you’ve sourced locally is a joy and you’ll gain complete control over the shape and design of your spoons.
If you’ve decided to stick with using hand tools, then the carving hatchet is the tool to use for working a log or branch into a spoon blank that’s ready for the knife. Ideally, a spoon blank should be refined enough that all you’re doing is removing the rougher marks left behind by the axe. There shouldn’t be large amounts of shaping left to do. Beginners often don’t release how refined a finished product an axe can create. As a result they settle for a very rough spoon blank.
The axe can remove a lot of material quickly, a lot quicker than with a knife. A little extra axe work will save your muscles for the delicate control that’s needed in the knife work. The downside of quickly removing a lot material is that mistakes can happen quicker. One wrong swing and you’re left with considerably less spoon than you’d planned.
Being able to axe to a line is a skill, one that I thoroughly recommend folks practice. If you’re using a template, try and axe right down to the line you’ve drawn. Sure, you’ll end up ruining a couple spoon blanks during the learning process, but making mistakes is a necessary part of learning. The benefit you’ll gain is a spoon blank that’s more enjoyable to work with.
2. Rough Surfaces
One thing that stands out on a really well carved utensil is the consistency of the cuts. Seeing smooth, clean surfaces left by a skilled carver is a big motivation for many folks starting out in carving. Getting a smooth surface requires control, concentration and patience. This issue has some of the same root causes as chunky blanks. People that are new to spoon carving are often excited to move on to the next part of the process. If you haven’t done as much work with the axe as perhaps you should then the spoon blank is going to have problems that are difficult to solve with the less powerful knife. These problems can be a source of frustration that means they either get ignored or are tackled in a less than optimal manner.
The simplest way to overcome irregular surfaces is to always be aiming for shavings that are as long as possible. In my classes you can see who is developing their spoon carving skills the quickest just by the looking at the length of wood shavings at their feet, Even the axe can create curly shavings! So the problem of a bumpy surface is something that’s easiest to manage if you try and do things right from the very beginning. Take your time with the cuts. When you’re using the knife, you have to feel for how the blade is engaging with the wood. Sloyd knives typically have quite wide bevels that we use to guide our cuts. Having to focus on the changes in resistance throughout a cut requires us to use our sense of touch in a way we don’t often get to in our day-to-day lives. This reconnecting with our physical bodies is one of the things that makes getting a long curly wood shaving such a rewarding experience. I’ve carved countless spoons and I still get a feeling of achievement from each long shaving I’m able to produce.
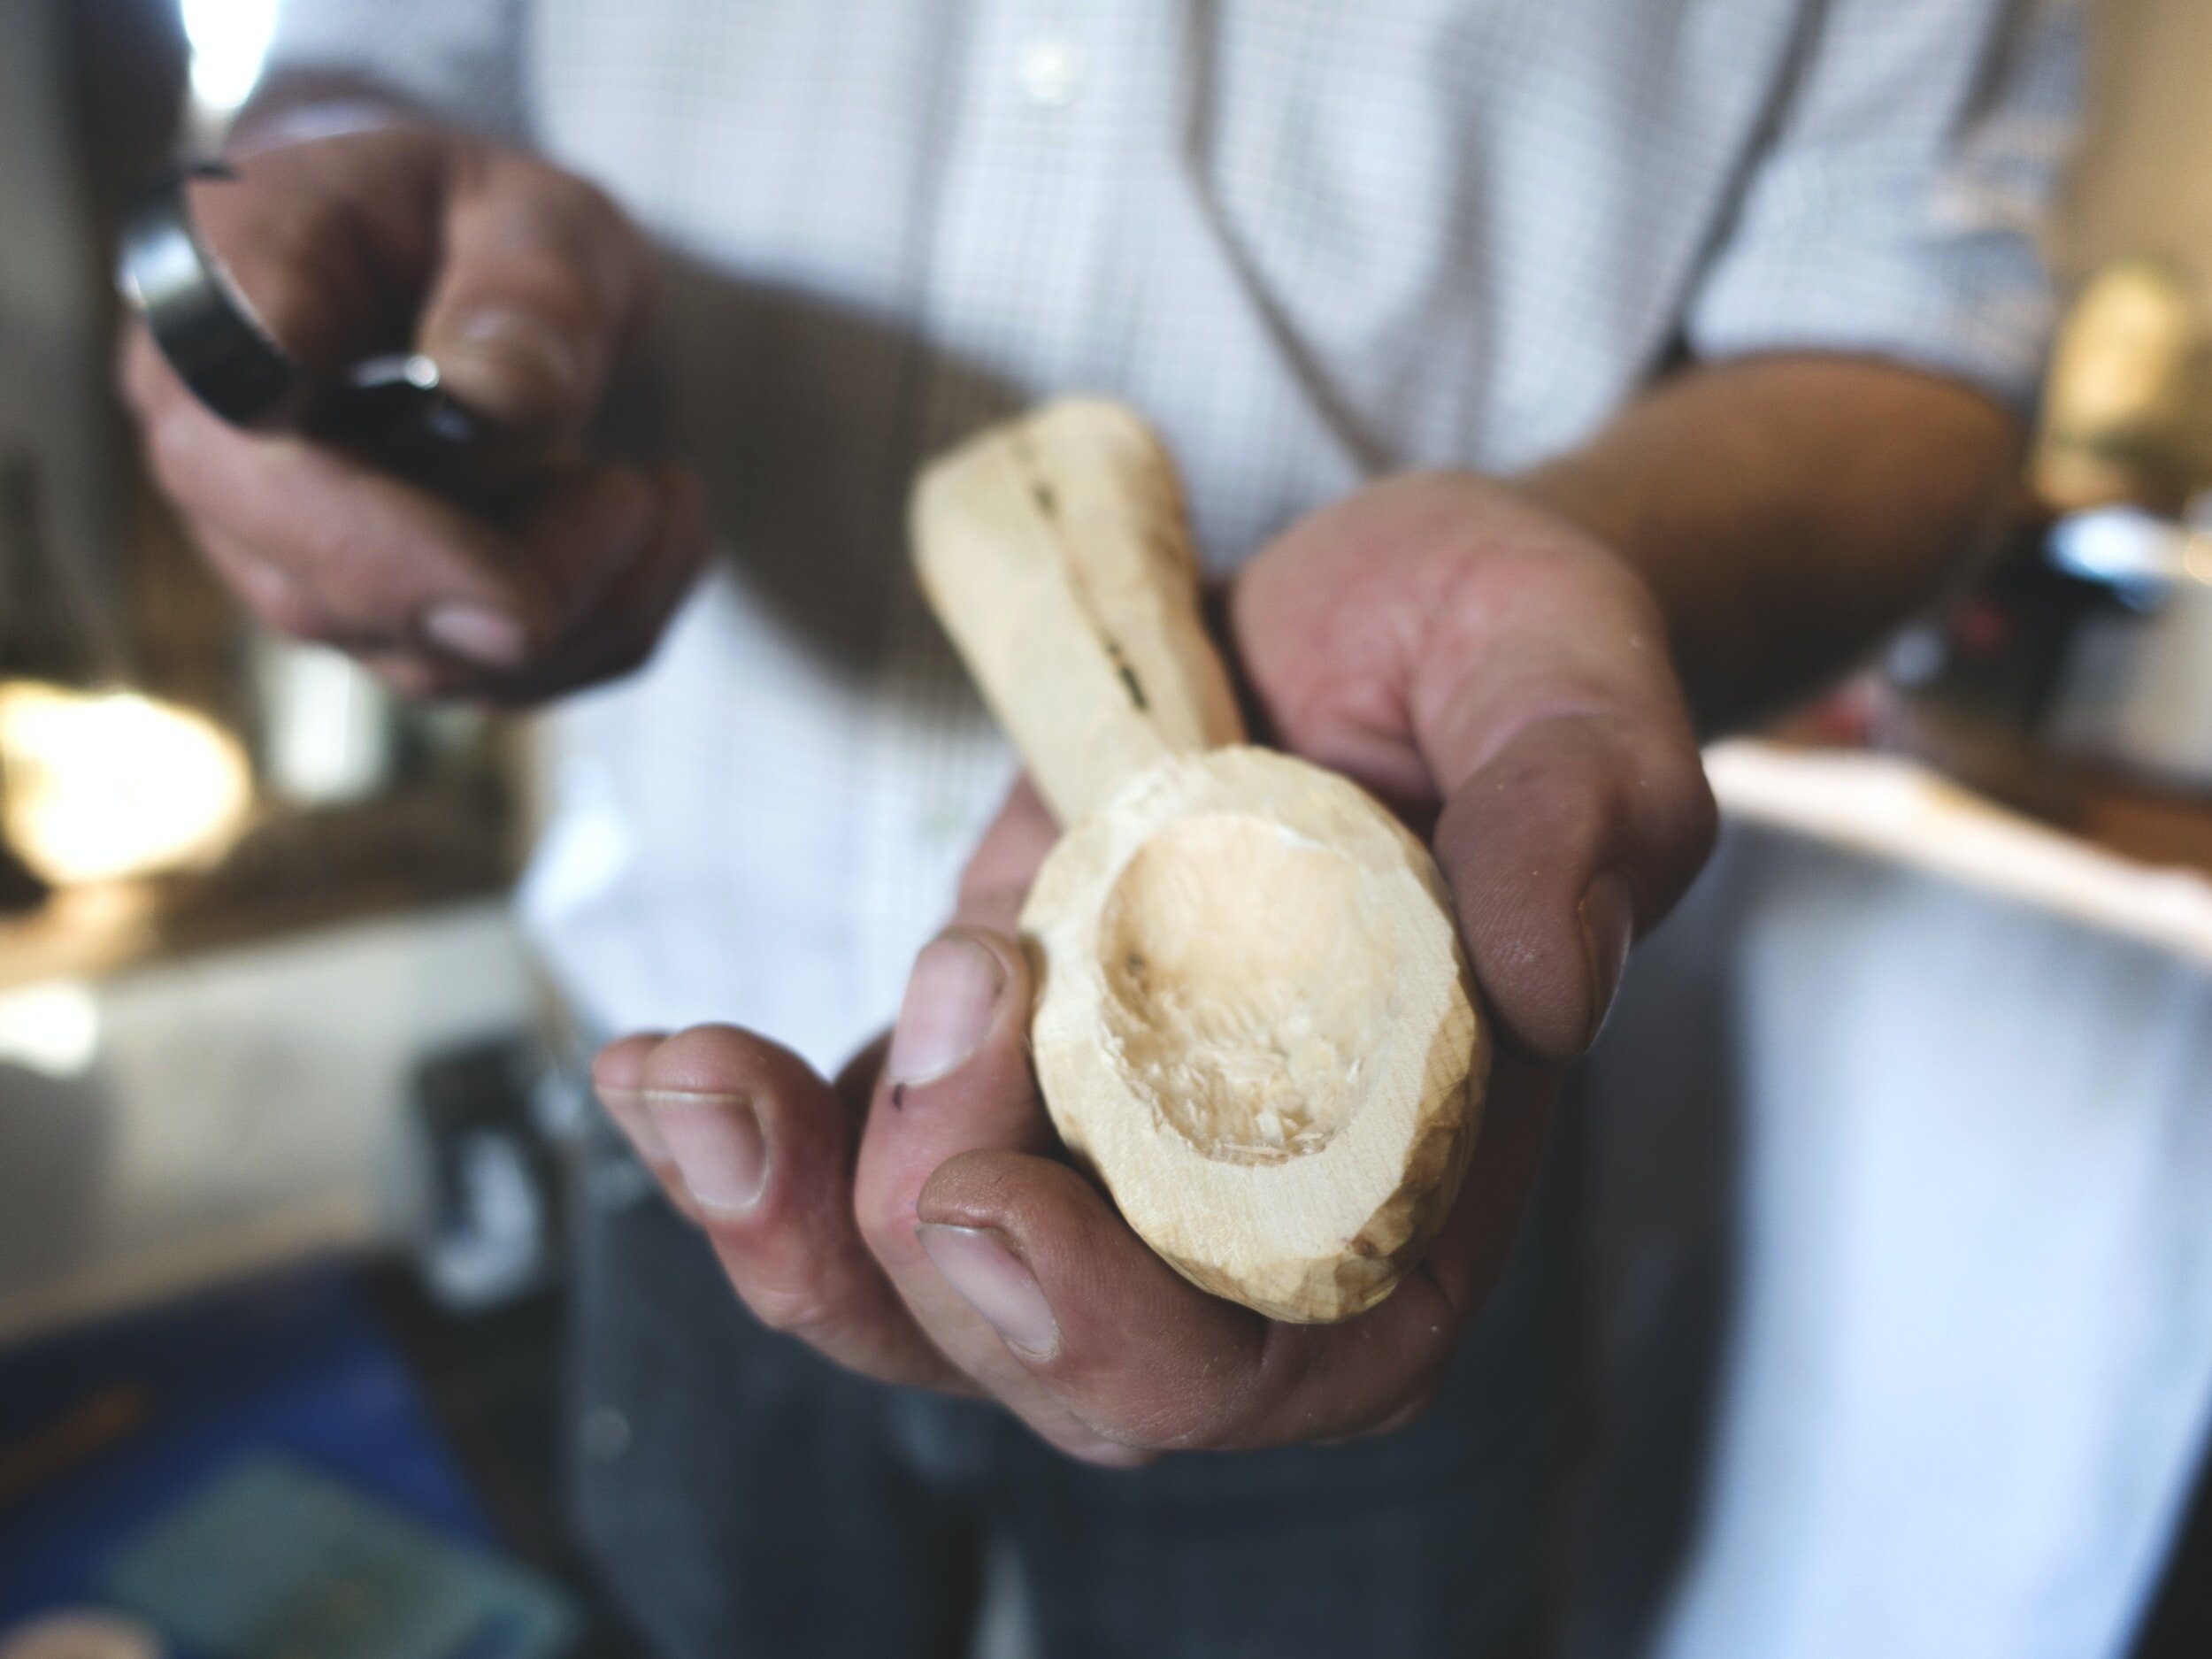
You’ve been trying your best, but accurate and smooth cuts are a skill that takes time to develop, and you’re working with a spoon that have a rough surface. Is that spoon a lost cause?
No! The secret to smoothing out a rough surface is to stop trying to make long shavings. Confused? Let me explain. If you try and get a long shaving from a lumpy surface, you’re attempting to make single cut that gets under all the lowest points to reveal a fresh, smooth surface. The problem with this is that the knife will also pass under all the highest points along that surface too. Let’s think about what happens to knife if we try and cut under a lump in the surface of the wood. When the edge gets to being directly under the high spot, that shaving is getting gradually getting thicker. A thicker shaving doesn’t curly away from the knife as easily, which increases the resistance you’ll feel in the cut. To keep the cut moving you’ll keep adding force to the cut. Just when the you’re adding maximum force, the knife reaches the high point and starts to move past it. Now there’s less and less resistance, but more force than you can easily control. Without control, the knife is going to follow the path of least resistance, coming out of the cut. On a very rough section of wood the knife edge might then embed partway up in the next lump down the line.
A better method is to start at the very top of a lump and shave off just the top, working your way down until you’re removed the lump down to the level you want. Repeat this process on each lump that’s along the plane you’re working on. Even small lumps can throw you off and cause the knife to skip out of a cut. These smaller lumps can be difficult to see so I often find it easiest to feel for them instead.
3. Skinny Neck
The area where the spoon handle meets the bowl is tricky to get right. Aesthetically, the neck, the end of the handle and the tip of the bowl should all line up to create a balance looking spoon. Beginners will carve a slightly wonky spoon and end up taking off too much material from the neck trying to even up the spoon’s shape. Just knowing to line up those three parts of the spoon is often enough to save a spoon neck from getting too skinny.
The other, and probably more common, issue is getting a smooth finish. The grain on either side of the neck is often a valley, the downhill grain of the shoulders of the bowl meeting the downhill grain of the handle. Not only that but it’s also often quite a tight concave curve, tricky to shape without the right tool and technique. Being able to carve a smooth, tight curve is one of the reasons I recommend the Mora 106 over the Mora 120. The longer blade on the 106 gives it a thinner tip, which allows it to navigate tighter curves than the wider 120.
To get a smooth finish I recommend switching between the reinforced chest pull and the thumb push/pivot grips. This technique is for after the shaping cuts are done and you’re down to working on finer cuts to get a smooth finish. Use the reinforced chest pull when cutting down from the bowl into the handle. Rest the fingers of your non-dominant hand on the back of the knife blade so just the tip of the knife is being used cut. The fingers of the back of the blade provide the force for the cut. Since you should only be removing very thin shavings, these cuts won’t require much force. Your dominant hand, gripping the knife handle should just pivot at the wrist to guide the knife through the curve. You can ever-so-slightly pull the knife downwards to create a slicing motion. This movement should be very small as you want the knife tip to remain in contact with the wood at all times, and not slip off at the bottom of the cut. Another reason to be very gentle with these cuts is that you want to be able to feel for when the resistance of the cut changes, a sign that the grain has changed direction and you should stop cutting. This is one of the many great things about spoon carving. It helps us connect with the different sensory inputs of our body, especially when most of us rely solely of sight and sound for most our days. With a very sharp tool and good technique, it’s possible to make shallow, against the grain, cuts. Bringing the knife out of the cut just as the grain changes direction will require you to take your time, slowly feeling for that change in texture transmitted through the knife. Once that happens, flip the spoon around and grip the handle. I find the thumb push/pivot is a good grip to use cutting down the handle towards the bowl. It will take a little bit of back and forth, but going slow and using these two grips with result in a smooth finish in this otherwise tricky area.
4. Too Deep Bowls
Again, there are a couple of reasons behind why beginners make this mistake. The first is similar to having too thin spoon necks. The inside of a spoon bowl has a several areas where the grain changes direction. Beginners often aren’t aware of this, so will find themselves carving against the grain, which results in an uneven surface, so they remove more and more material to try and smooth out the surface. If they don’t accidentally carve right through the bottom of the bowl, they end up with an excessively deep bowl.
I recommend that the rough hollowing of a bowl is done by cutting across the grain. Cutting across the grain pretty much ignores the issue of changing grain direction in the bowl. It works best when the shavings are very thin. Properly riding the bevel on a hook knife is tricky. Beginners often try and cut too deeply into the bowl, rather than aiming across it.
This cross grain technique isn’t well suited to creating a tidy rim on the spoon bowl. To get a really smooth finish you’ll have to cut with the grain. In a spoon carved from straight wood, the grain in the bowl should be cut in 4 different directions.
From the tip of the bowl, along the right side of the rim cutting towards the back of the bowl, stopping at the widest/deepest part of the bowl
From the tip of the bowl, along the left side of the rim cutting towards the back of the bowl, stopping at the widest/deepest part of the bowl
From the base of the handle, along the right side of the rim, cutting towards the front of the bowl, stopping at the widest/deepest part of the bowl
From the base of the handle, along the left side of the rim, cutting towards the front of the bowl, stopping at the widest/deepest part of the bowl
5. Blunt Tools
Carving is most enjoyable when your tools are razor-sharp. Carving takes less effort, you’re more in control of the tool and the surface each cut leaves on the wood is silky smooth. In spite of all these benefits, folks will still put off sharpening as long as possible.
I totally get it, you got into carving because you want to make spoons, not grind steel. The problem with carving more and sharpening less is that you’re going to spend more time sharpening when you eventually get round to it. And that’s the best case scenario. Worst case is you injure yourself. It takes a lot more force to push a blunt tool through wood. Adding force increases the likelihood of the cut slipping. The tool might end up embedded somewhere unpleasant. A knife that’s too blunt for safe carving is still sharp enough to do damage to our puny human forms.
The really fine edge of a super sharp tool doesn’t last that long. I’m often asked “how often should I sharpen?” and there isn’t a one size fits all answer. It depends on the wood species, the kind of tool you’re using, the moisture content of the wood, how aggressively you’re carving, and a host of other factors.
Once you’ve gain enough experience you'll know how a tool feels when it’s sharp and carving well. Spoon carving teaches you to tune into your sense of touch for feedback on factors like the condition of your tools’ edges.
For beginners who want a rough rule of thumb, if you’re not pausing to at least strop for two minutes out of every 15 minutes spent carving then you’re probably missing out on the joy of passing a sharp tool through wood.
A lot of folks I’ve taught sharpening to have discovered that learning how to sharpen and maintain their own tools gives them a great sense of accomplishment and self-sufficiency. Develop the skills to sharpen your sloyd knife and you’ll be able to keep kitchen knives, scissors and even lawn mower blades in tip-top condition.
Sharpening is a skill of it’s own. It does take time to learn. What you’re aiming for with sharpening is to raise a burr along the edge of the tool. A burr is a thin wire that forms along the edge. You can feel for a burr by flicking your thumbnail off the edge of the of the blade. If there’s a burr, your nail will catch on it. Focusing on just one side you want to raise a burr before sharpening the other side. Once you’ve raised a burr from both sides of the tool you can switch to a finer sharpening medium. In terms of grit, I usually start around 1000 grit, move on to 3000 and finish with 5000. If your tool is very dull or damaged you might need to start with a coarser grit. Coarse grits will remove material quicker, which can save you time. If you use too coarse a grit you’ll be removing more steel than necessary.
Bonus Tip: Not Taking Enough Breaks
When people first start carving they quickly discover how addicting it can be. Even if you have no formal wood carving experience there’s a good chance you’ve used a pocket knife to make a pointy stick. A large portion of my childhood summers was spent making big sticks into smaller, pointer sticks. Removing wood with a sharp tool just feels good. But it’s not something most people do on a regular basis. So it’s good to start slow.
Carving with hand tools uses really small muscles in your hands and forearms. Muscles that typically don’t get much use in our modern world. When I first started carving I remember having to peel my fingers off the tool handle because they’d gotten stuck in that position! You can save yourself from cramps and sore muscles by taking lots of little breaks to stretch and shake out muscle groups that might be getting their first proper workout in a long time!
Another issue with carving without breaks is getting blisters. Nearly everything in our homes and workplaces are designed to be smooth. Rarely are there any of the coarse textures that crop up so often in nature. Handling freshly cut wood, axes and knives regularly will prompt your body to respond to this new stimulus by toughening up the skin of hands. This adaptation takes a while. Try too much, too soon and you’ll get a blister. Blisters will heal and even turn into protective calluses, but they’re painful. If you’ve got a blister and continue to carve you start changing the way you hold the tool to avoid this painful area. Depending on the change you make, you might start performing the knife grips in an unsafe manner. Better to take regular breaks so blisters don’t develop in the first place.