8 Things Efficient Spoon Carvers Do
I carve a lot of spoons. Often in quite high volumes. Little inefficiencies in my process quickly add up to a lot of time wasted. If you’re carving spoons and not getting as much done as you’d like, or you just want the process to go more smoothly, then these tips are for you.
If you’re carving spoons because it’s the one time in your busy week when you’re able to slow down and you just want to enjoy the process of pushing a sharp tool through green wood, then rock on. Not every carving session has to be about reaching maximum efficiency.
It’s good to remind ourselves that we hand make wooden spoons because we enjoy the process. Sometimes a bit of futzing and not caring about efficiency is exactly what we need. If that’s you, then there’s no need waste any time reading this (see, I can’t help but add efficiency your day).
1) They Have A Sharpening Station

One of the most common questions I get is ‘How often do you sharpen your tools?’ The correct response sounds a little trite: whenever they need sharpening. A great part of using hand tools is that it reconnects you to your body. There are a lot of knowledge workers out there who end up feeling like brains in jars. Carving with hand tools requires you to feel how the tool is interacting with the wood. Like how a blind person’s cane reveals the world around them, your hand tool sends signals about how it’s interacting with the wood. Once you gain an understanding of roughly how it should feel, you’ll quickly sense when something’s wrong. A change in grain direction, maybe the cut is wandering off its intended path, or perhaps the tool feels sluggish and needs a sharpen.
Little and often is the best way to keep your tools sharp. So your ‘sharpening station’ doesn’t have to be much more than having a strop next to you when you’re carving. Our tools have very fine edges, that’s what makes them sharp. However it also makes them relatively delicate. Grit and other bits of debris can damage the edge and require more steel removal than is efficient with a strop. That’s when having your stones or sandpaper ready to use allows you to fix the error and get back to carving as soon as possible.
Setting up a sharpening station also primes you mentally. A lot of folks don’t enjoy sharpening. It’s a tough skill to learn. So they put off sharpening. Having all your sharpening kit laid out ready to use is admitting to yourself that sharpening needs to happen. So you might as well make it easy to do.
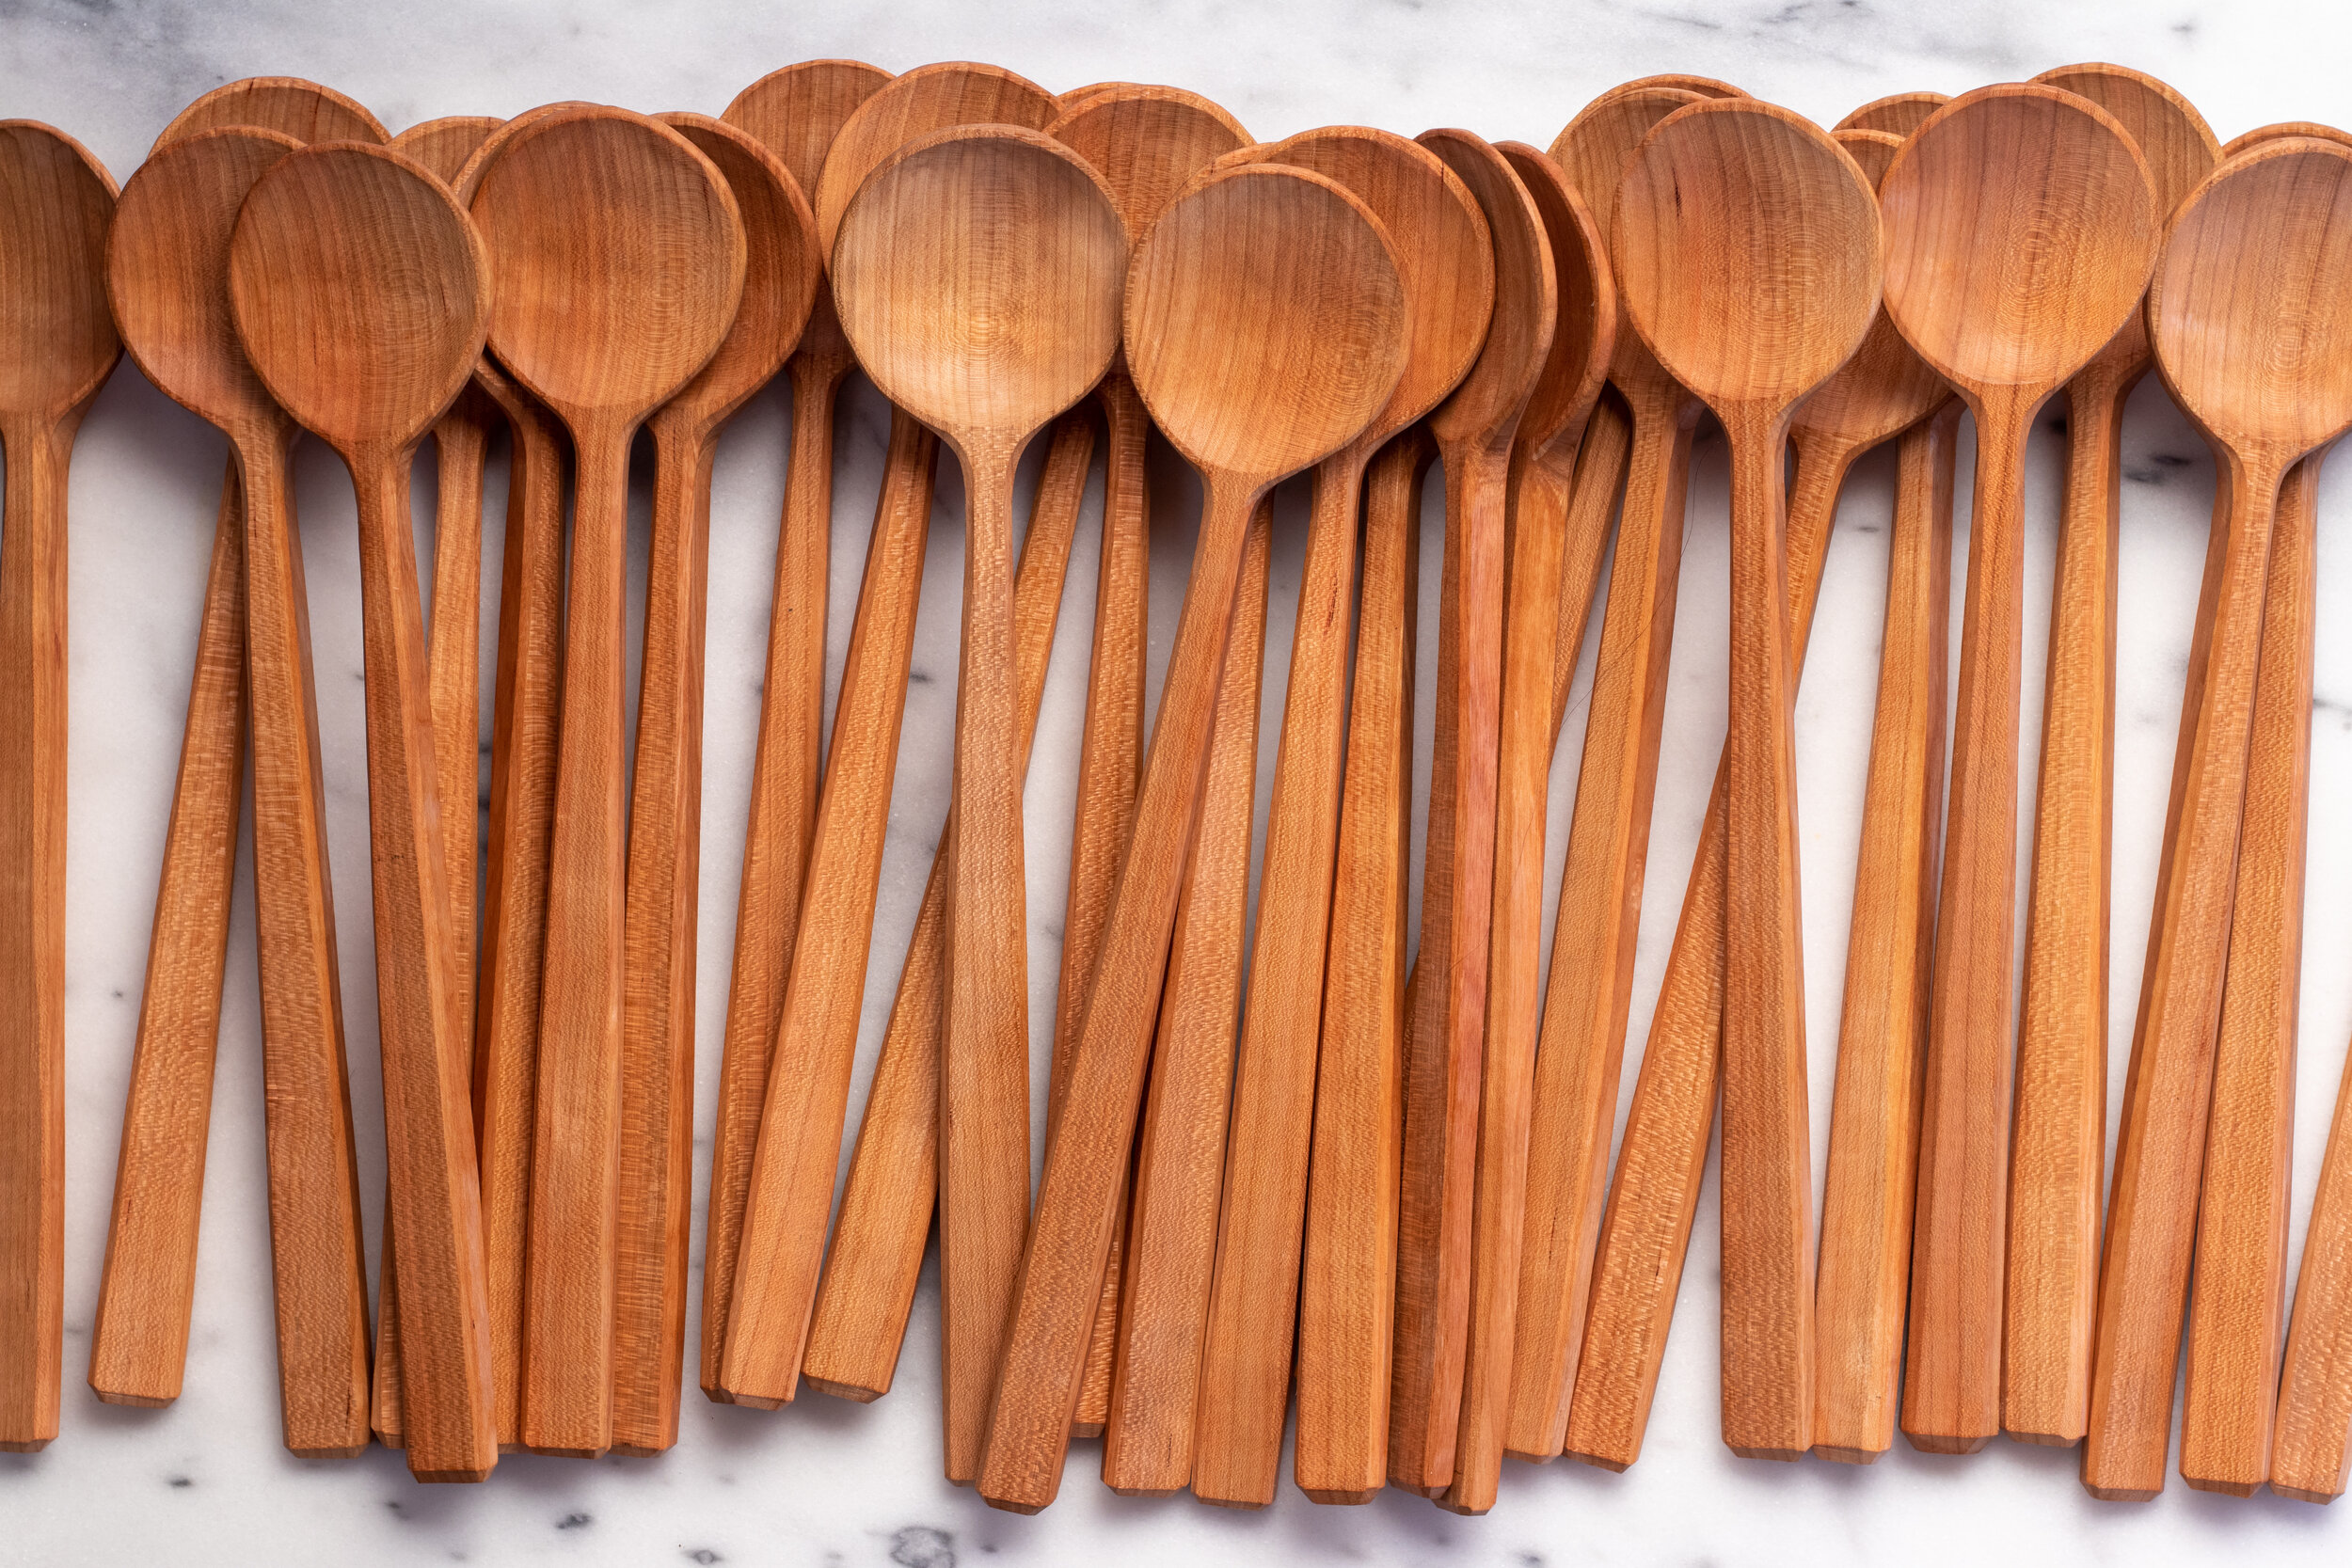
2) They Work in Batches
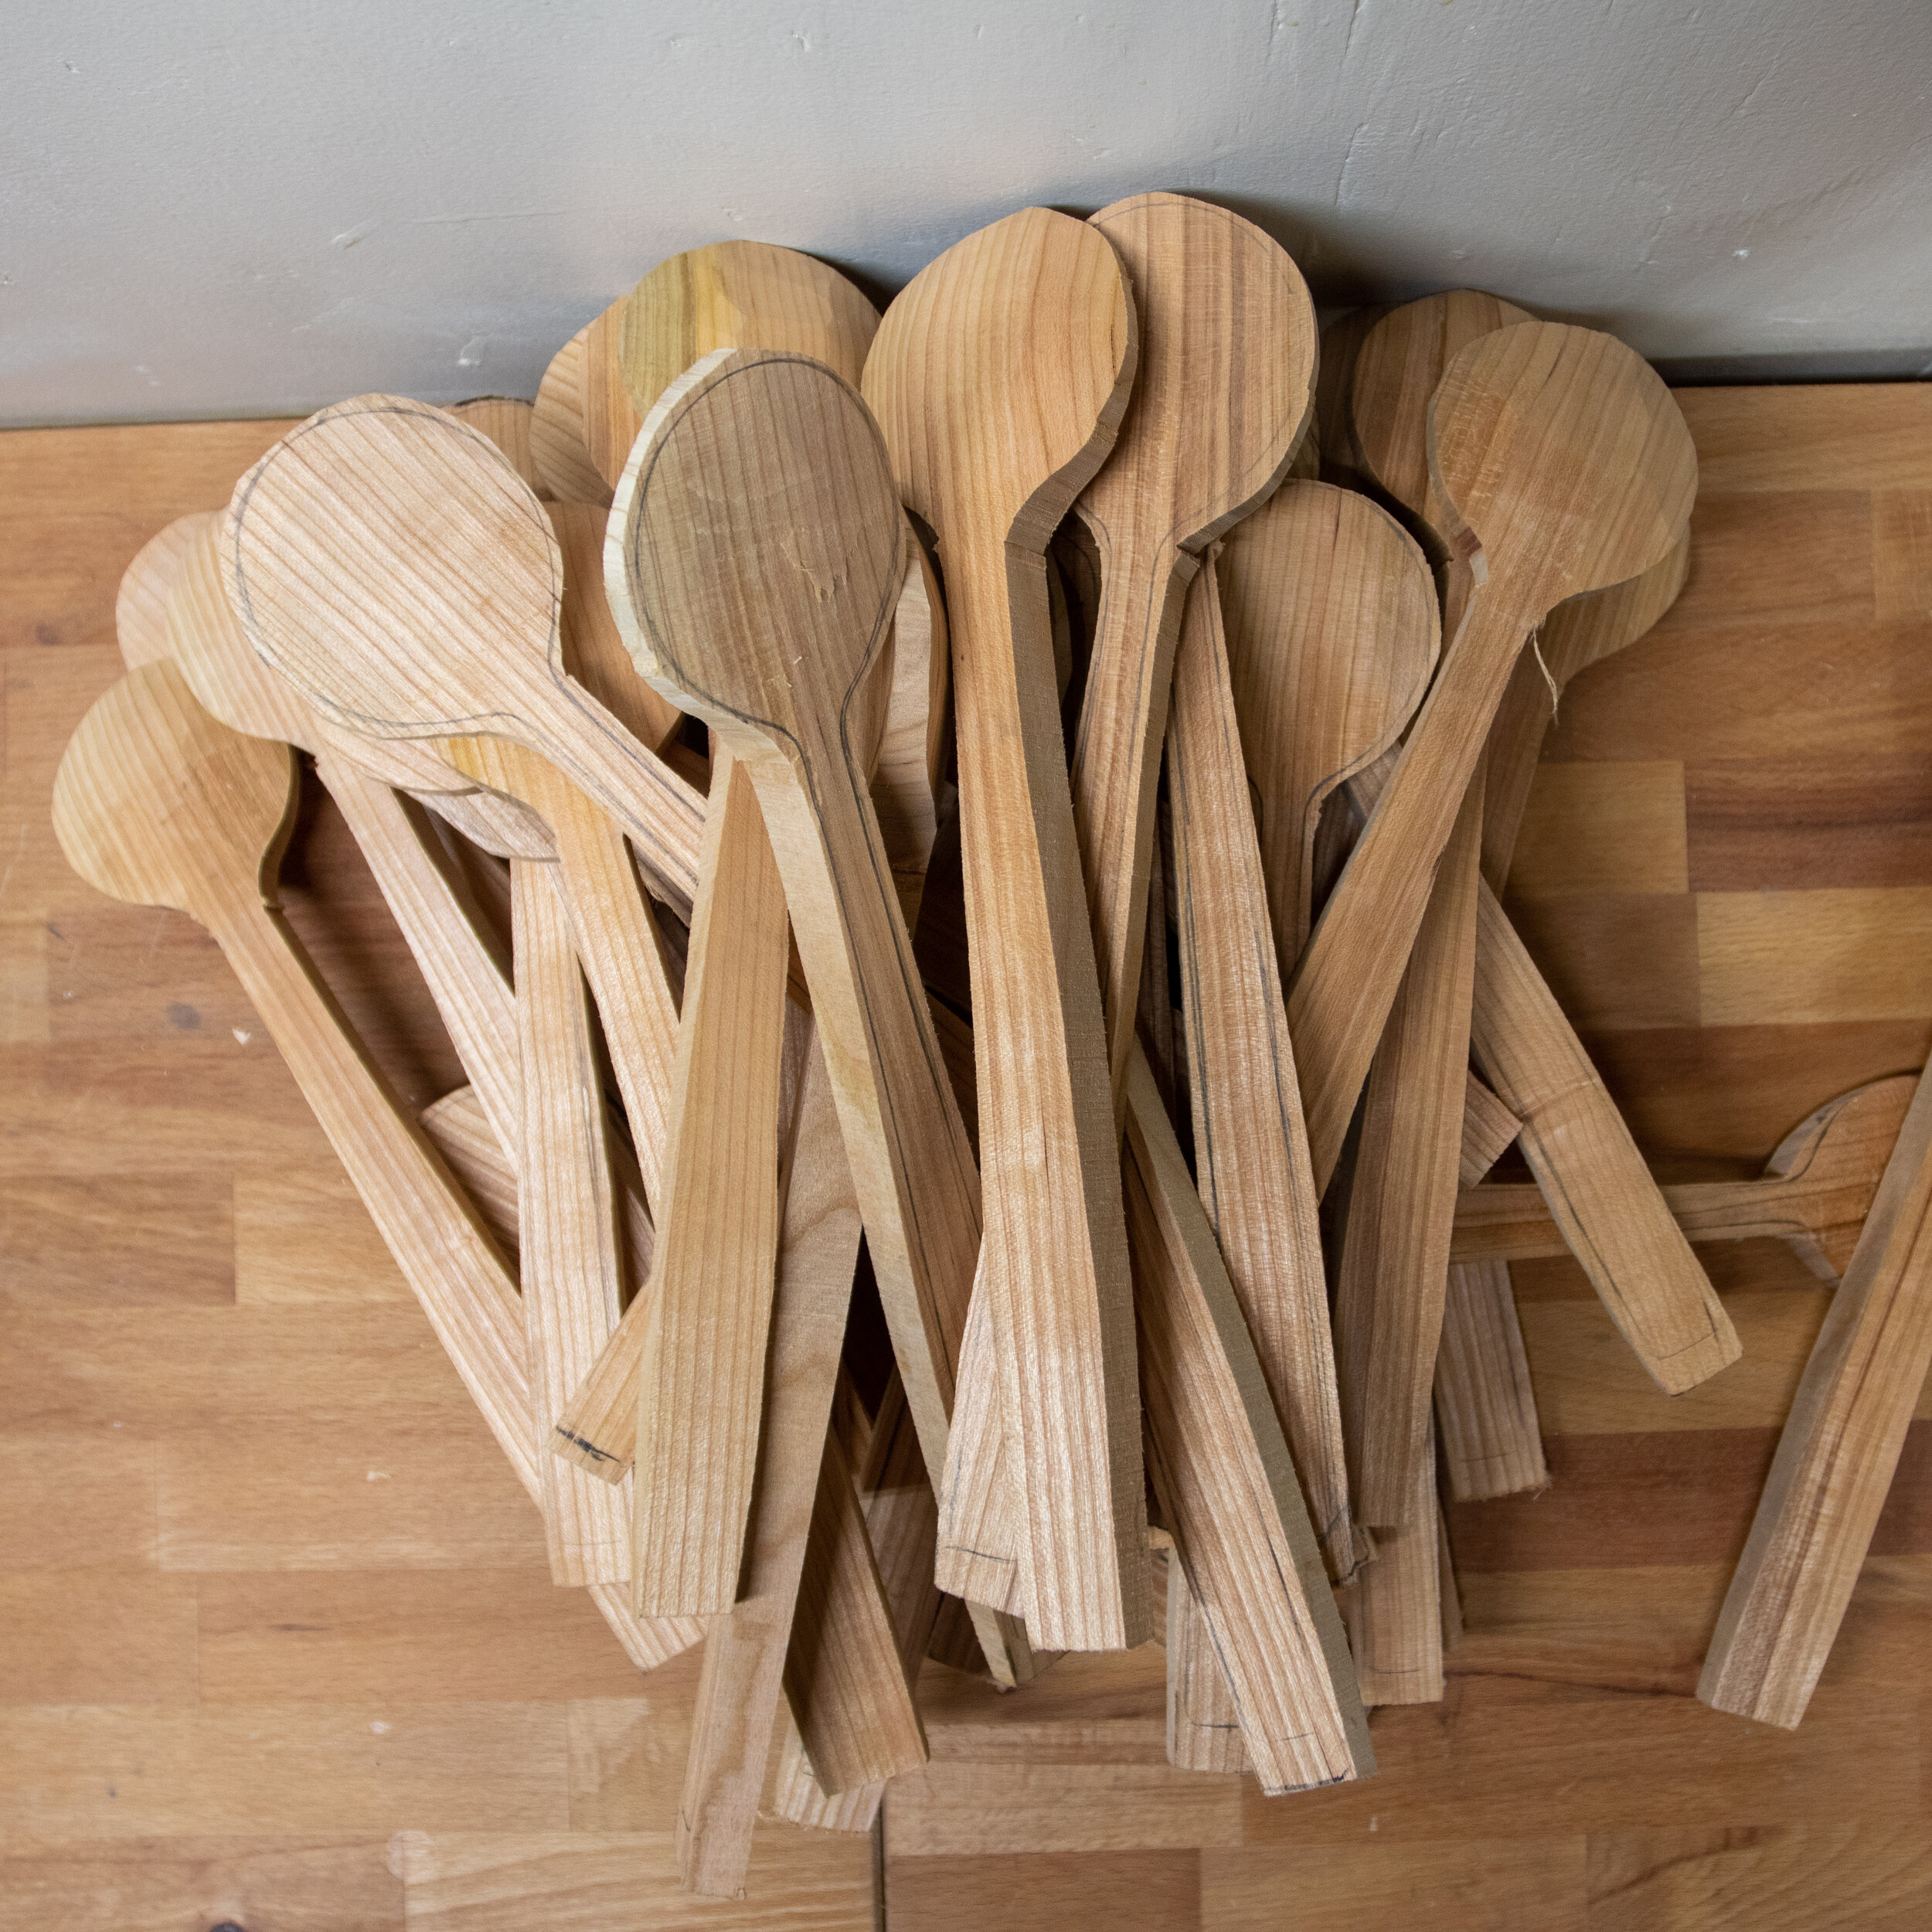
Everyone should do some batch work as part of their spoon carving journey. Trying to carve multiple copies of the same shape is great for learning a whole multitude of skills. It teaches you consistency, you learn to see how a utensil is made, and it allows to practice specific areas of spoon carving.
My preferred method for batch work is to pick how many copies I’m gong to make then working all of them to the same point. That point varies, but it’s usually either once I’m done with a particular surface or a particular tool.
For example, I’ll cut a round of wood to length and split out twelve billets. Then I’ll use the axe to square them up. I might do some more refined squaring on the shave horse. Then I’ll draw on my template. These days I use my bandsaw to cut around the template. If the shed needs warming up, or I’ve eaten one too many donuts, I’ll use the axe for this part. Depending on the utensils I might then axe the top crank in to the spoon bowl, then rough shape the bottom of the each of the spoon with the axe. Then I’ll take all twelve and refine the top with the drawknife. Then refine the underside of all twelve. Then hollow. Then make the finishing cuts.
Batch work, especially if you’re concentrating, will show you want techniques work best in different areas. If a new technique clicks while hollowing, you get to immediately practice it several more times. If you had to work another spoon all the way to that point from scratch before you could try the same technique again, you’re more likely to lose grip off all the different variables in body position, cut direction and so forth that made the technique work.
3) They Understand That Not Every Item Is Going To Make It
I work with almost entirely with urban wood. One of the really special things about urban trees is that they all exist because someone wanted them there. Either a person planted it, or they let a young sapling mature. The decision to remove a mature tree can be tough. The tree might be in declining health, or it’s starting to damage property. When someone contacts me because they’re removing a tree on their property and they want me to use the wood, I feel a responsibility to put that wood to its best possible use. So discarding unsuitable wood can feel irresponsible.
Recently I discovered that about three feet of one of my cherry logs was essentially unusable due to insect damage. That section of the log had a rotted out centre, part of the reason it was cut down, and insects were able to crawl into that hollow and burrow through wood they usually wouldn’t get to. They’d left lots of very small holes throughout the wood. I tried laying out my designs to avoid the holes, but I’d either miss one and find out later my spoon was now a draining spoon, or it would take me far too long, with a spoon laid out with less than ideal grain orientation. I spent about half a day juggling these bug bitten billets before abandoning them. I cut the log back until I was hitting clean wood and was a much happier carver.
Wood always throws these curveballs our way. If it’s not insect damage then it’s a hidden knot. Or a bark inclusion. Or wind shake. Or steel staples. Or a bit of rot. Or unexpected wavy grain. Or a flintlock shotgun. You never know what you might find. Once you’ve found it, sometimes the best course of action is to discard it and start over on a fresh piece of wood. We can get hung up by the sunk cost fallacy (“I’ve already spent 30 minutes on this spoon, if I stop then that time will be wasted”). The problems in the wood might mean you spend another hour to finish it, ending up with a finished, but potentially inferior product. That extra hour could have been spent on a carving a much more agreeable piece of wood into a finished spoon.
4) They Use the Most Efficient Tool for the Job
A great thing about spoon carving is that you only need four tools: a saw, an axe, a straight knife and bent knife. Throw in a chopping block too if you want to count that as a tool. But that’s it. This point isn’t about adding more tools to your kit. It’s knowing when you’re actually done with that tool. The inefficiencies creep in when someone switches tools when they’re not really done with the current one.
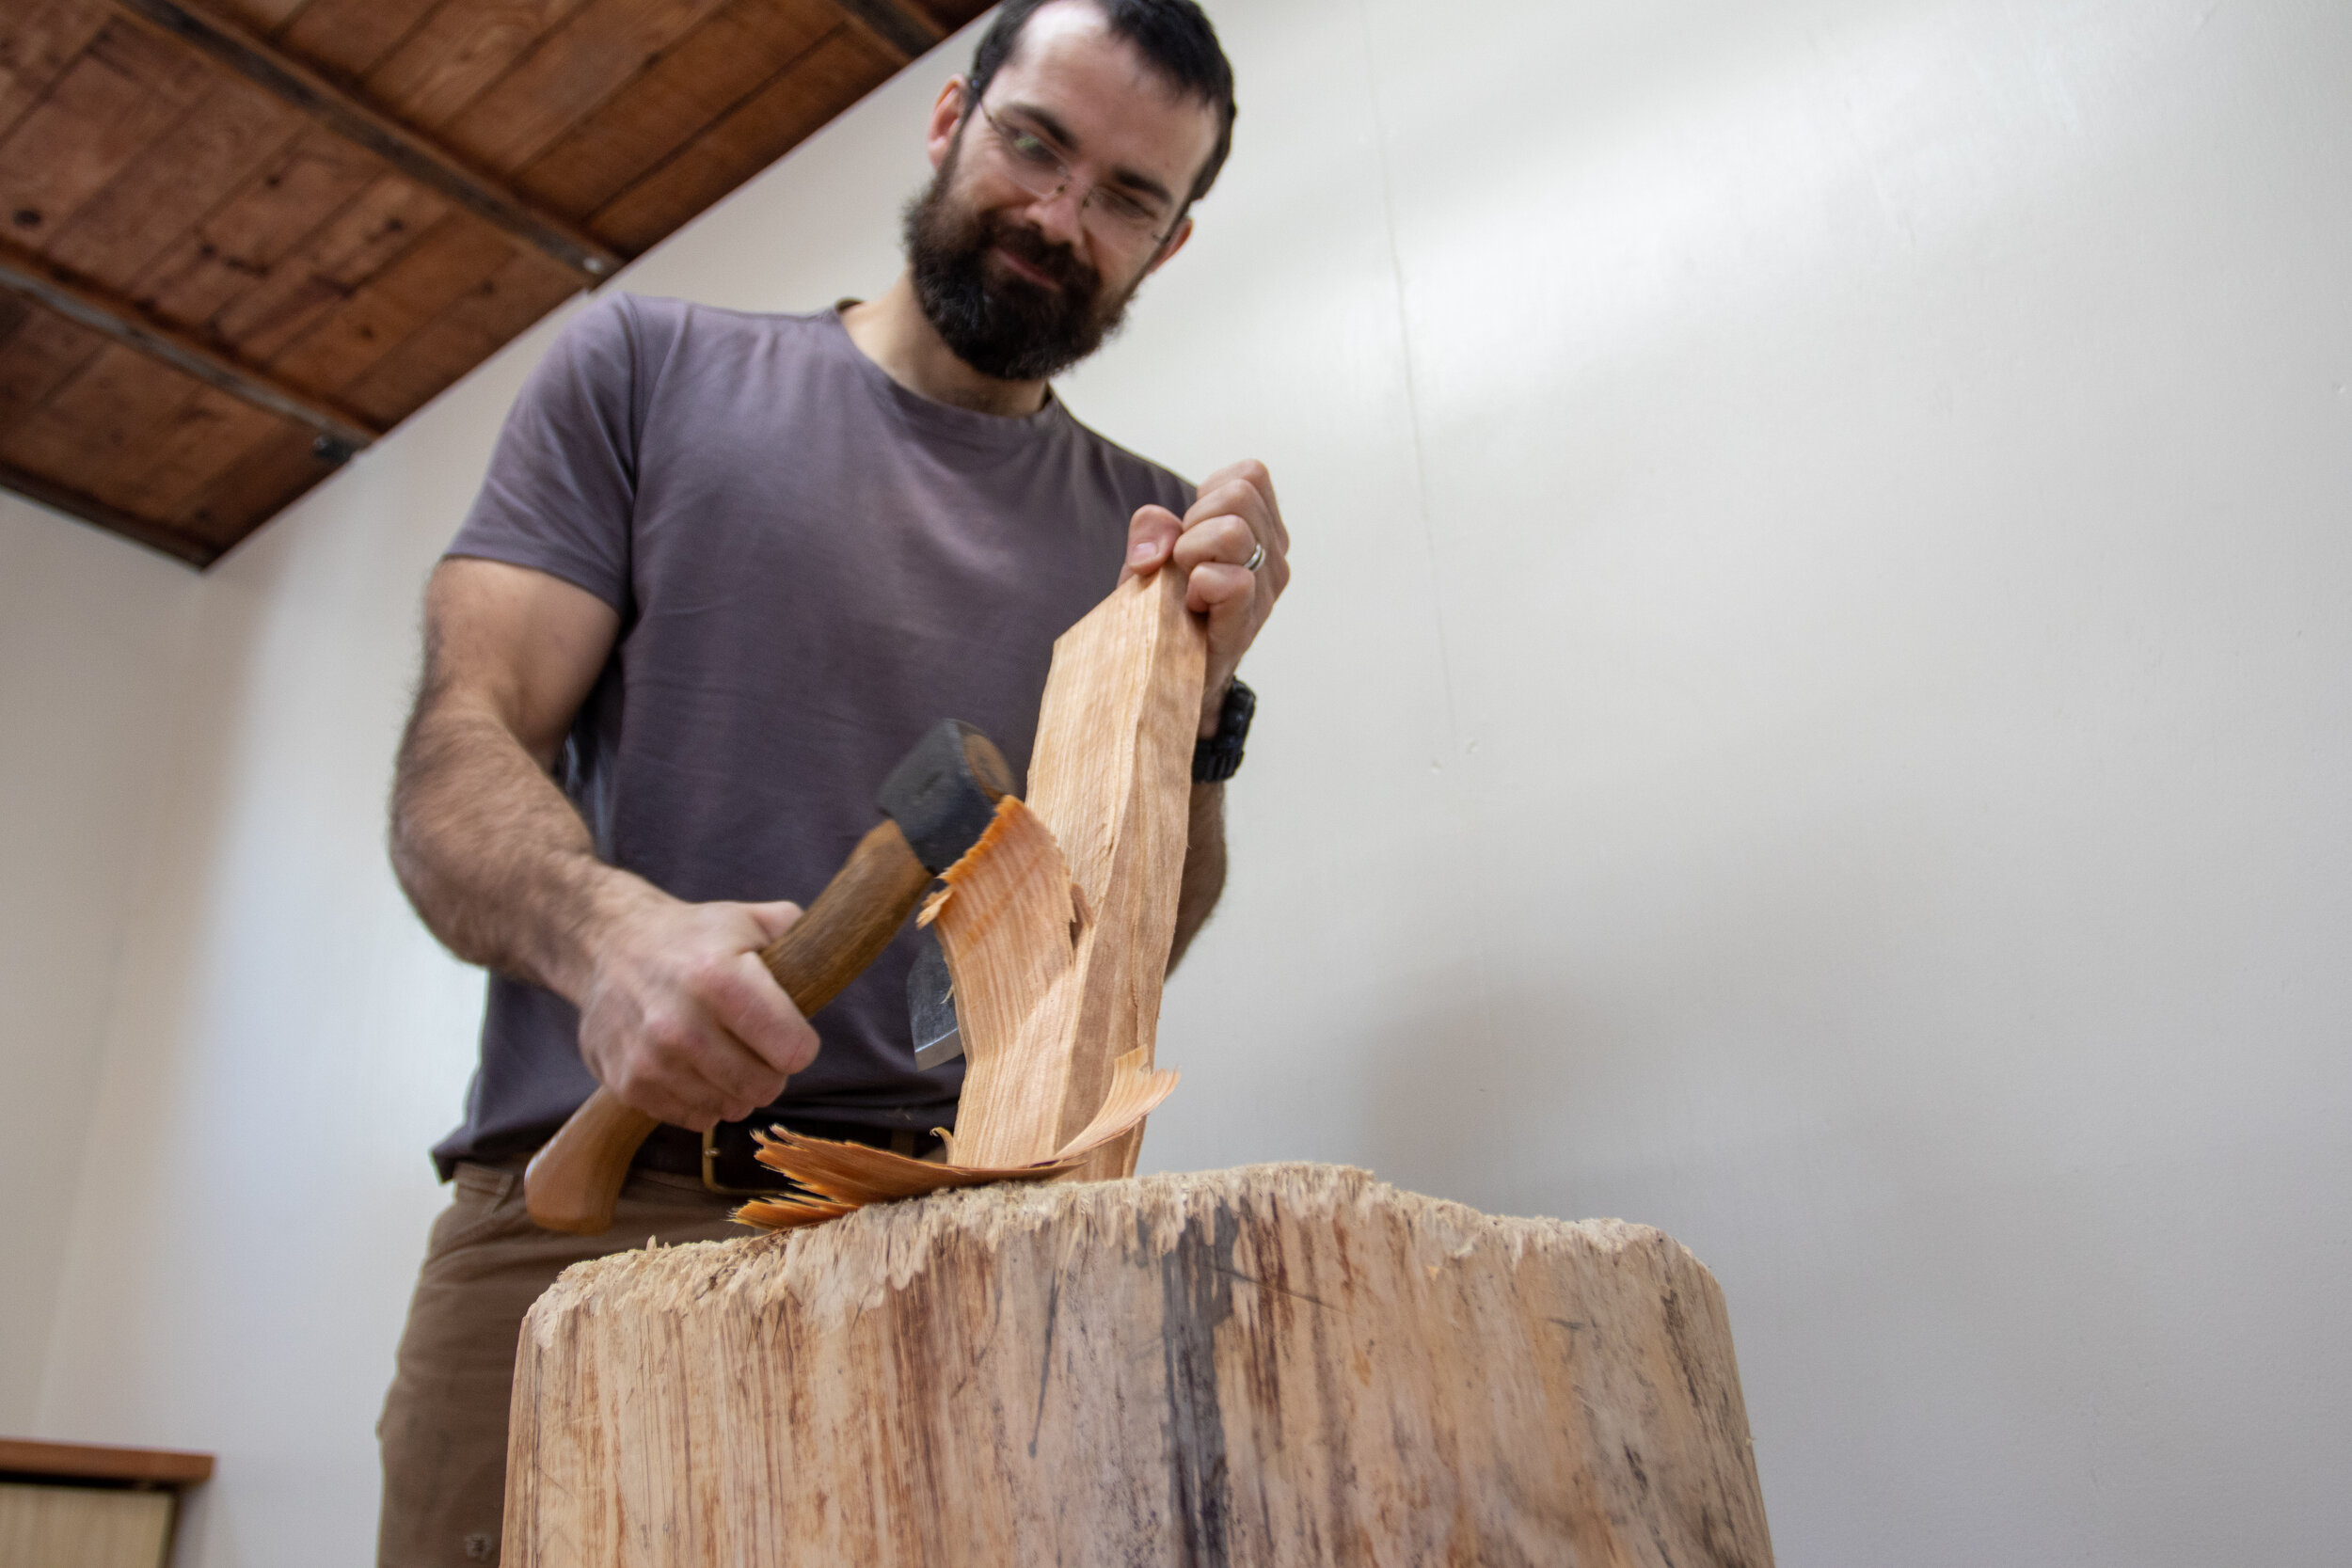
It’s a lot easier to saw a round to the correct length than to shorten it with cross grain axe blows. The axe removes material a lot quicker and with less effort than the knife. If you sand your spoons, the knife shapes wood a whole lot quicker than abrasives. There also comes a point where the tool you’re currently using isn’t the most efficient. If you’re taking the tiniest, itty bitty chops with the axe in order to get right up the line, could it be quicker to use the knife? Are you struggling to clean up the transition between the spoon handle and bowl, carving away more and more wood in the hint for a clean finish? Maybe a little sanding will finish the spoon before you carve it away to nothing.
It’s worth pushing yourself to go as far as you can with each tool and it’s good to know when a more precise tool will actually be more efficient.
5) They Use Appropriate Techniques
This is similar to using the most efficient tool for the job. It’s using the tool most efficiently for the job. For example, once we’ve got a round of wood we need to split it. Splitting removes material a lot quicker than carving. Using a hatchet to split a billet to the correct width is quicker (albeit potentially less accurate) than carving.
The most commonly overused technique is the thumb push/pivot grip with the sloyd knife. It’s a very safe, very accurate but not at all powerful. It relies on really small muscles in your hand and forearm that will fatigue quickly. There are lots of different ways to use a sloyd knife. Getting familiar with all the grips and how to use them will let you engage much bigger muscle groups, removing more material with less effort.

The appropriate technique isn’t always about removing the most material. A great example is this really fun axe grip. It lets you use the axe like the sloyd knife in the chest lever grip. If you’re just making a couple of cuts it might be quicker and easier to flip the axe around to this position than to sheath the axe, find your sloyd knife (I swear I put it on the bench a second ago) perform the cut, sheath the knife, unsheath the axe and get back to chopping.
Having a wide range of different techniques that you’re comfortable using will help you use the right technique to solve a particular problem.
6) They Have a Systematic Approach to Carving

Efficient carvers know when they’re done with one area of a spoon, what ‘done’ looks like and which area to move onto next. There’s no one right way to approach spoon carving. Some folks prefer tangentially split billets to radially split. Some add the crank to the billet first, then draw on their template. Some mad-cats don’t even use a template (how do they know what shape the spoon will be? We’ll never know).
Here are a few basic rules I follow:
Flatten the surface of the billet that will be the top of the spoon
Keep surfaces of the spoon blank perpendicular
Start with areas where the most material can be removed the quickest
Get the top surface right before working on the bottom
Hollow inside the bowl before refining the underside of the bowl
Don’t move on from one area until the work there is done.
7) They Take Breaks
We’ve all only got so much concentration juice. Once we begin to run low, we’re more likely to start making mistakes. Same for physical energy. When your muscles are tired and you push on, you’re more likely to modify your techniques and potentially hurt yourself.
The breaks don’t have to be long. The more efficient a carver you become, the better you will be at taking micro breaks. Put the tool down while you consider your next cuts, shaking out your hands after some precise shavings. Pause to sip some tea, realise it’s gone cold, make another cup, forget about it until all of its heat has seeped into the cold workshop air, ponder about the inefficiencies of your shed’s beverage based heating system.
Pauses are also useful times to take a look at your spoon and evaluate what needs doing. Put your tools down and run your fingers over the surface of the wood to find lumps that need removing. Or just enjoy looking at the grain you’ve recently unveiled.
8) They Set Carving Goals
It doesn’t matter how much time you’re able to set aside, but giving yourself the mental freedom to focus solely on carving will help you achieve more. If you can only spare 10 minutes of uninterrupted carving time, then set yourself a realistic goal for those 10 minutes, set a timer and go for it. You know you’re unlikely to go from a log to a spoon in 10 minutes, but you might be able to axe a billet into a blank, rough hollow a bowl or split a round into billets.
If you’re aiming to be more efficient, then creating targets is a great way to keep yourself focused. Parkinson’s law is the idea that work expands to fill the time available. Rather than giving yourself the amorphous goal of ‘carve a spoon’, know how much time you’ve got and set goals that stretch you just a little.
You’re probably aware of the idea of ‘flow’. Achieving it gives lots of positive benefits. Enjoyment of the activity, a feeling of being energized and immersion in the process. One of the conditions of achieving flow is that the activity needs to be challenging enough to require your full attention. Setting goals that stretch you will help you perform at a higher level, while enjoying the process more. Win win.
What breakthroughs in efficiency have you experienced? If you could speak to your beginner self, how would you help them avoid the pitfalls that stalled progress? Help the community out by sharing in the comments section.
If you enjoy the content of this site and find it to be useful, help me create other helpful articles by becoming a Patreon.