Anatomy of an Axe
There are many different kinds of axes. But all axes share similar features. Depending on the intended function of the axe, the shape of its features are going to differ.
To explore these common features we’re going to focus on the kind of axe I use most often: a carving hatchet.
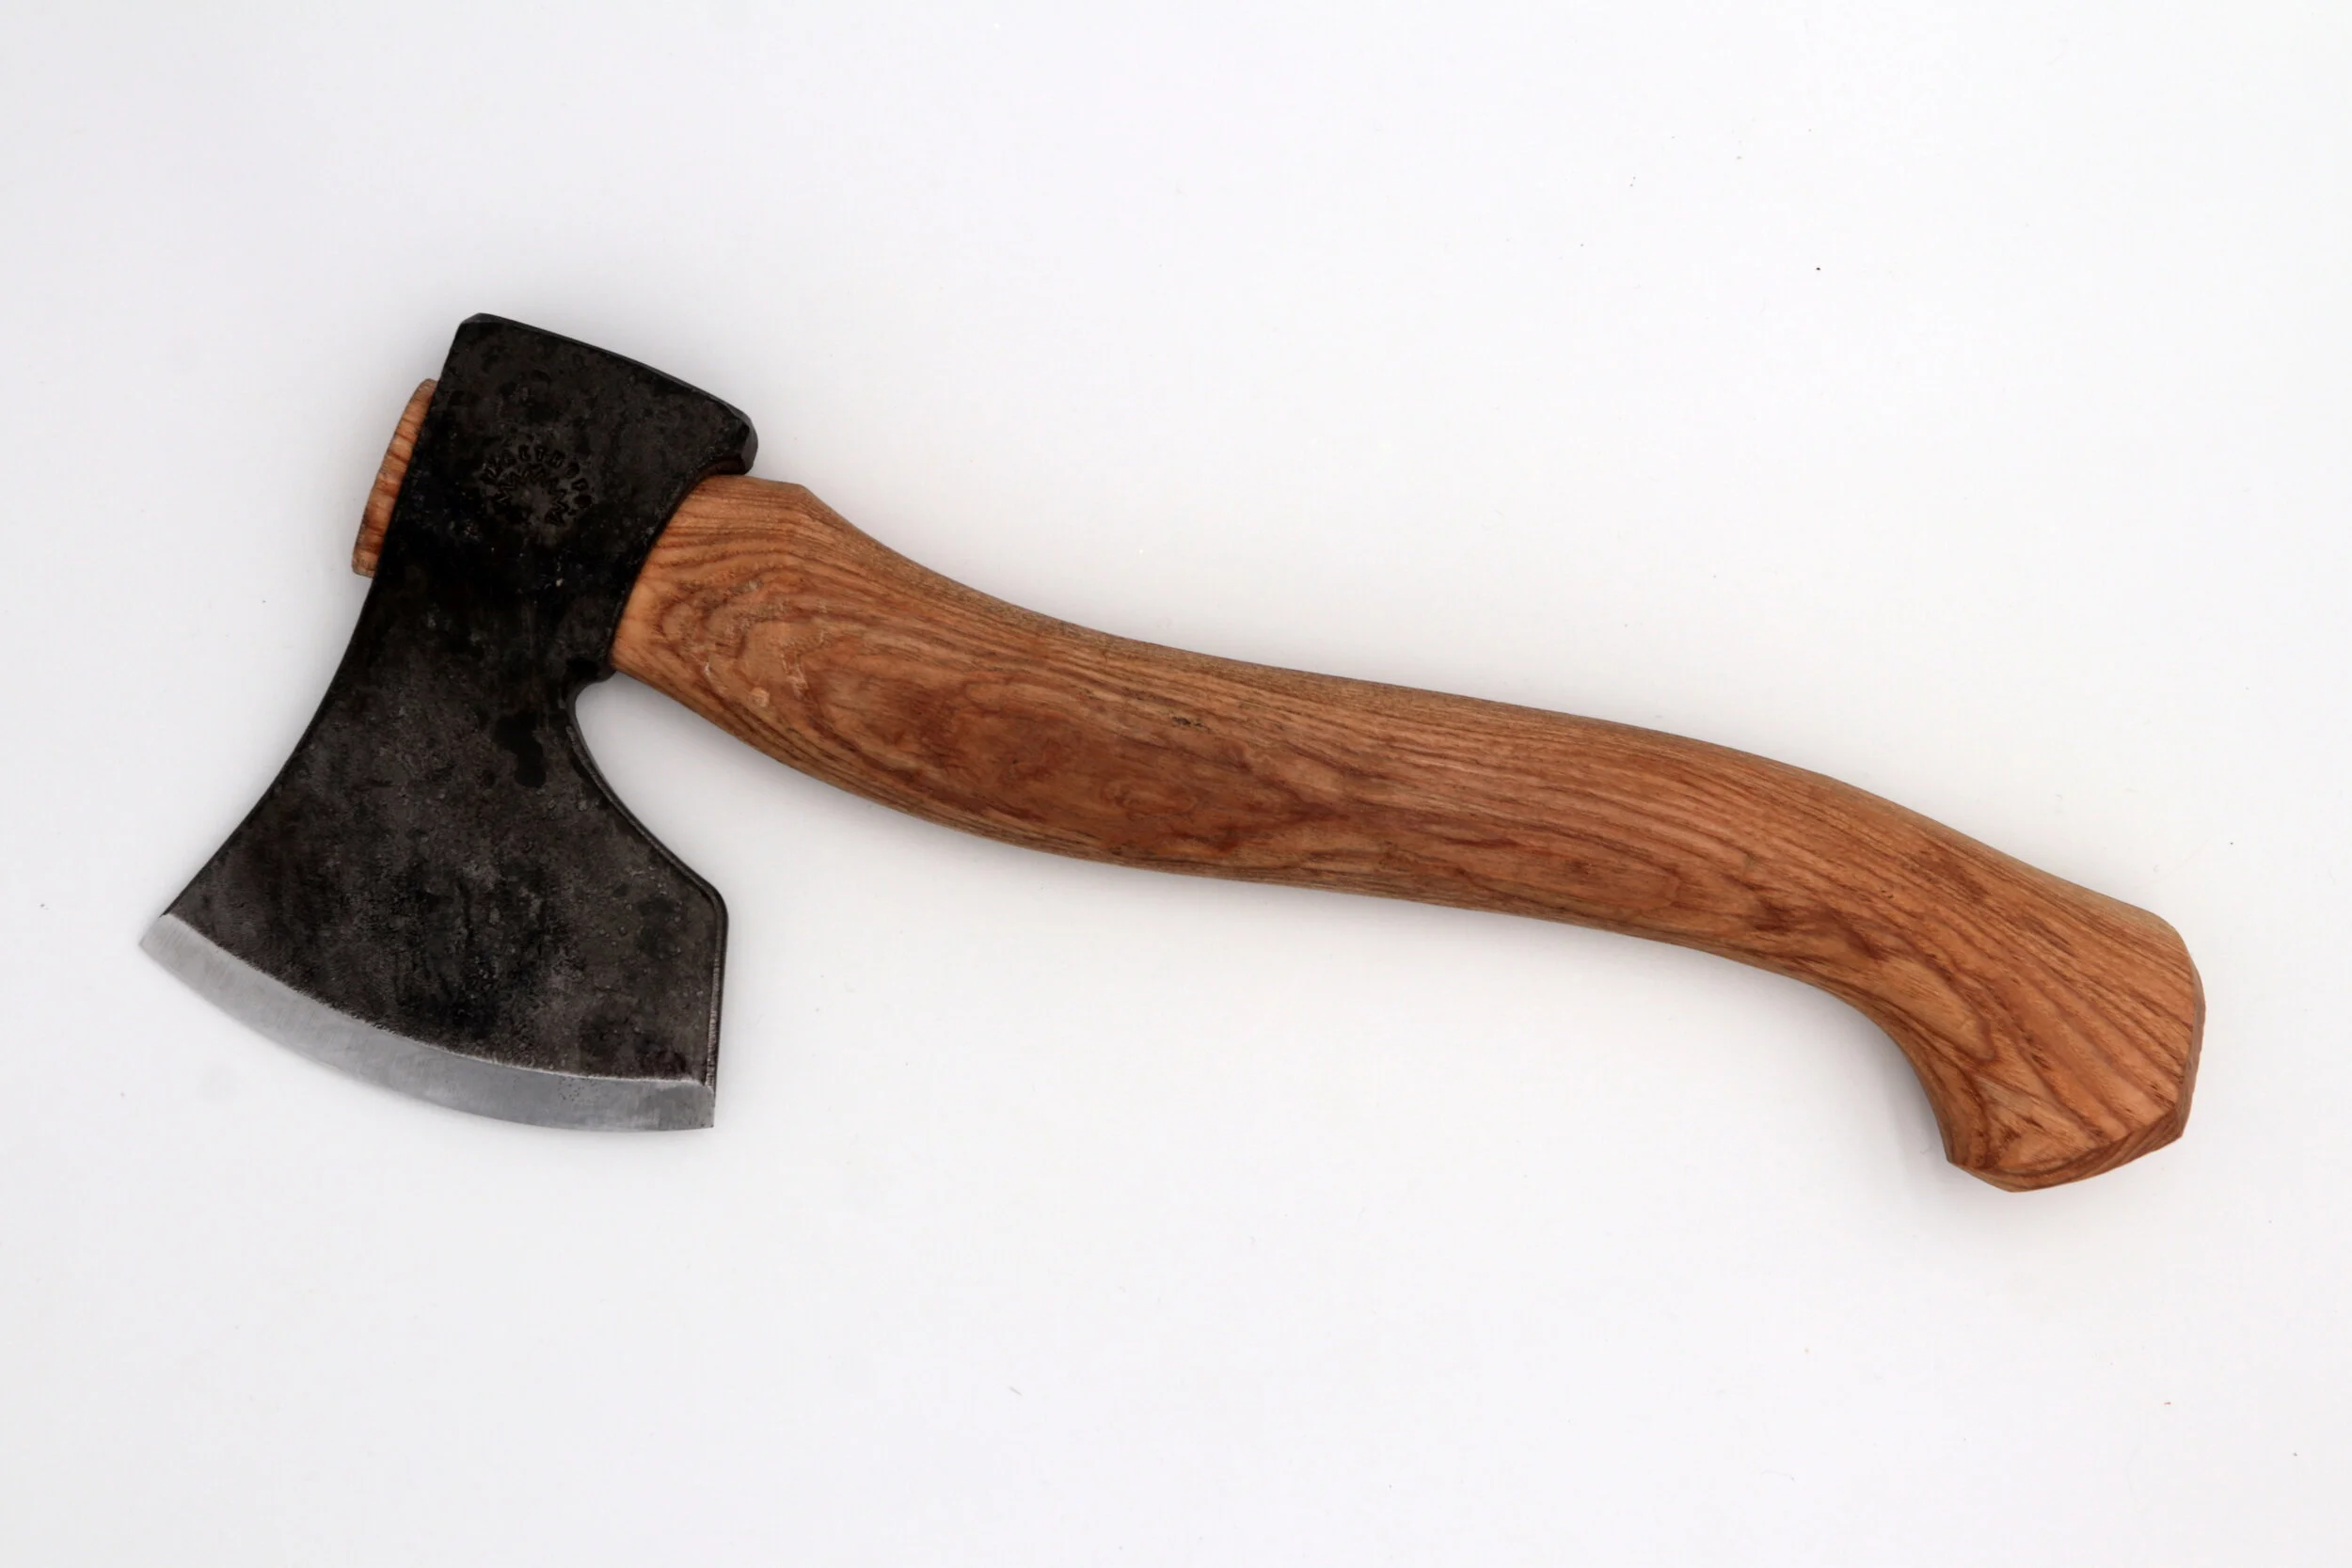
Carving hatchet by Julia Kalthoff
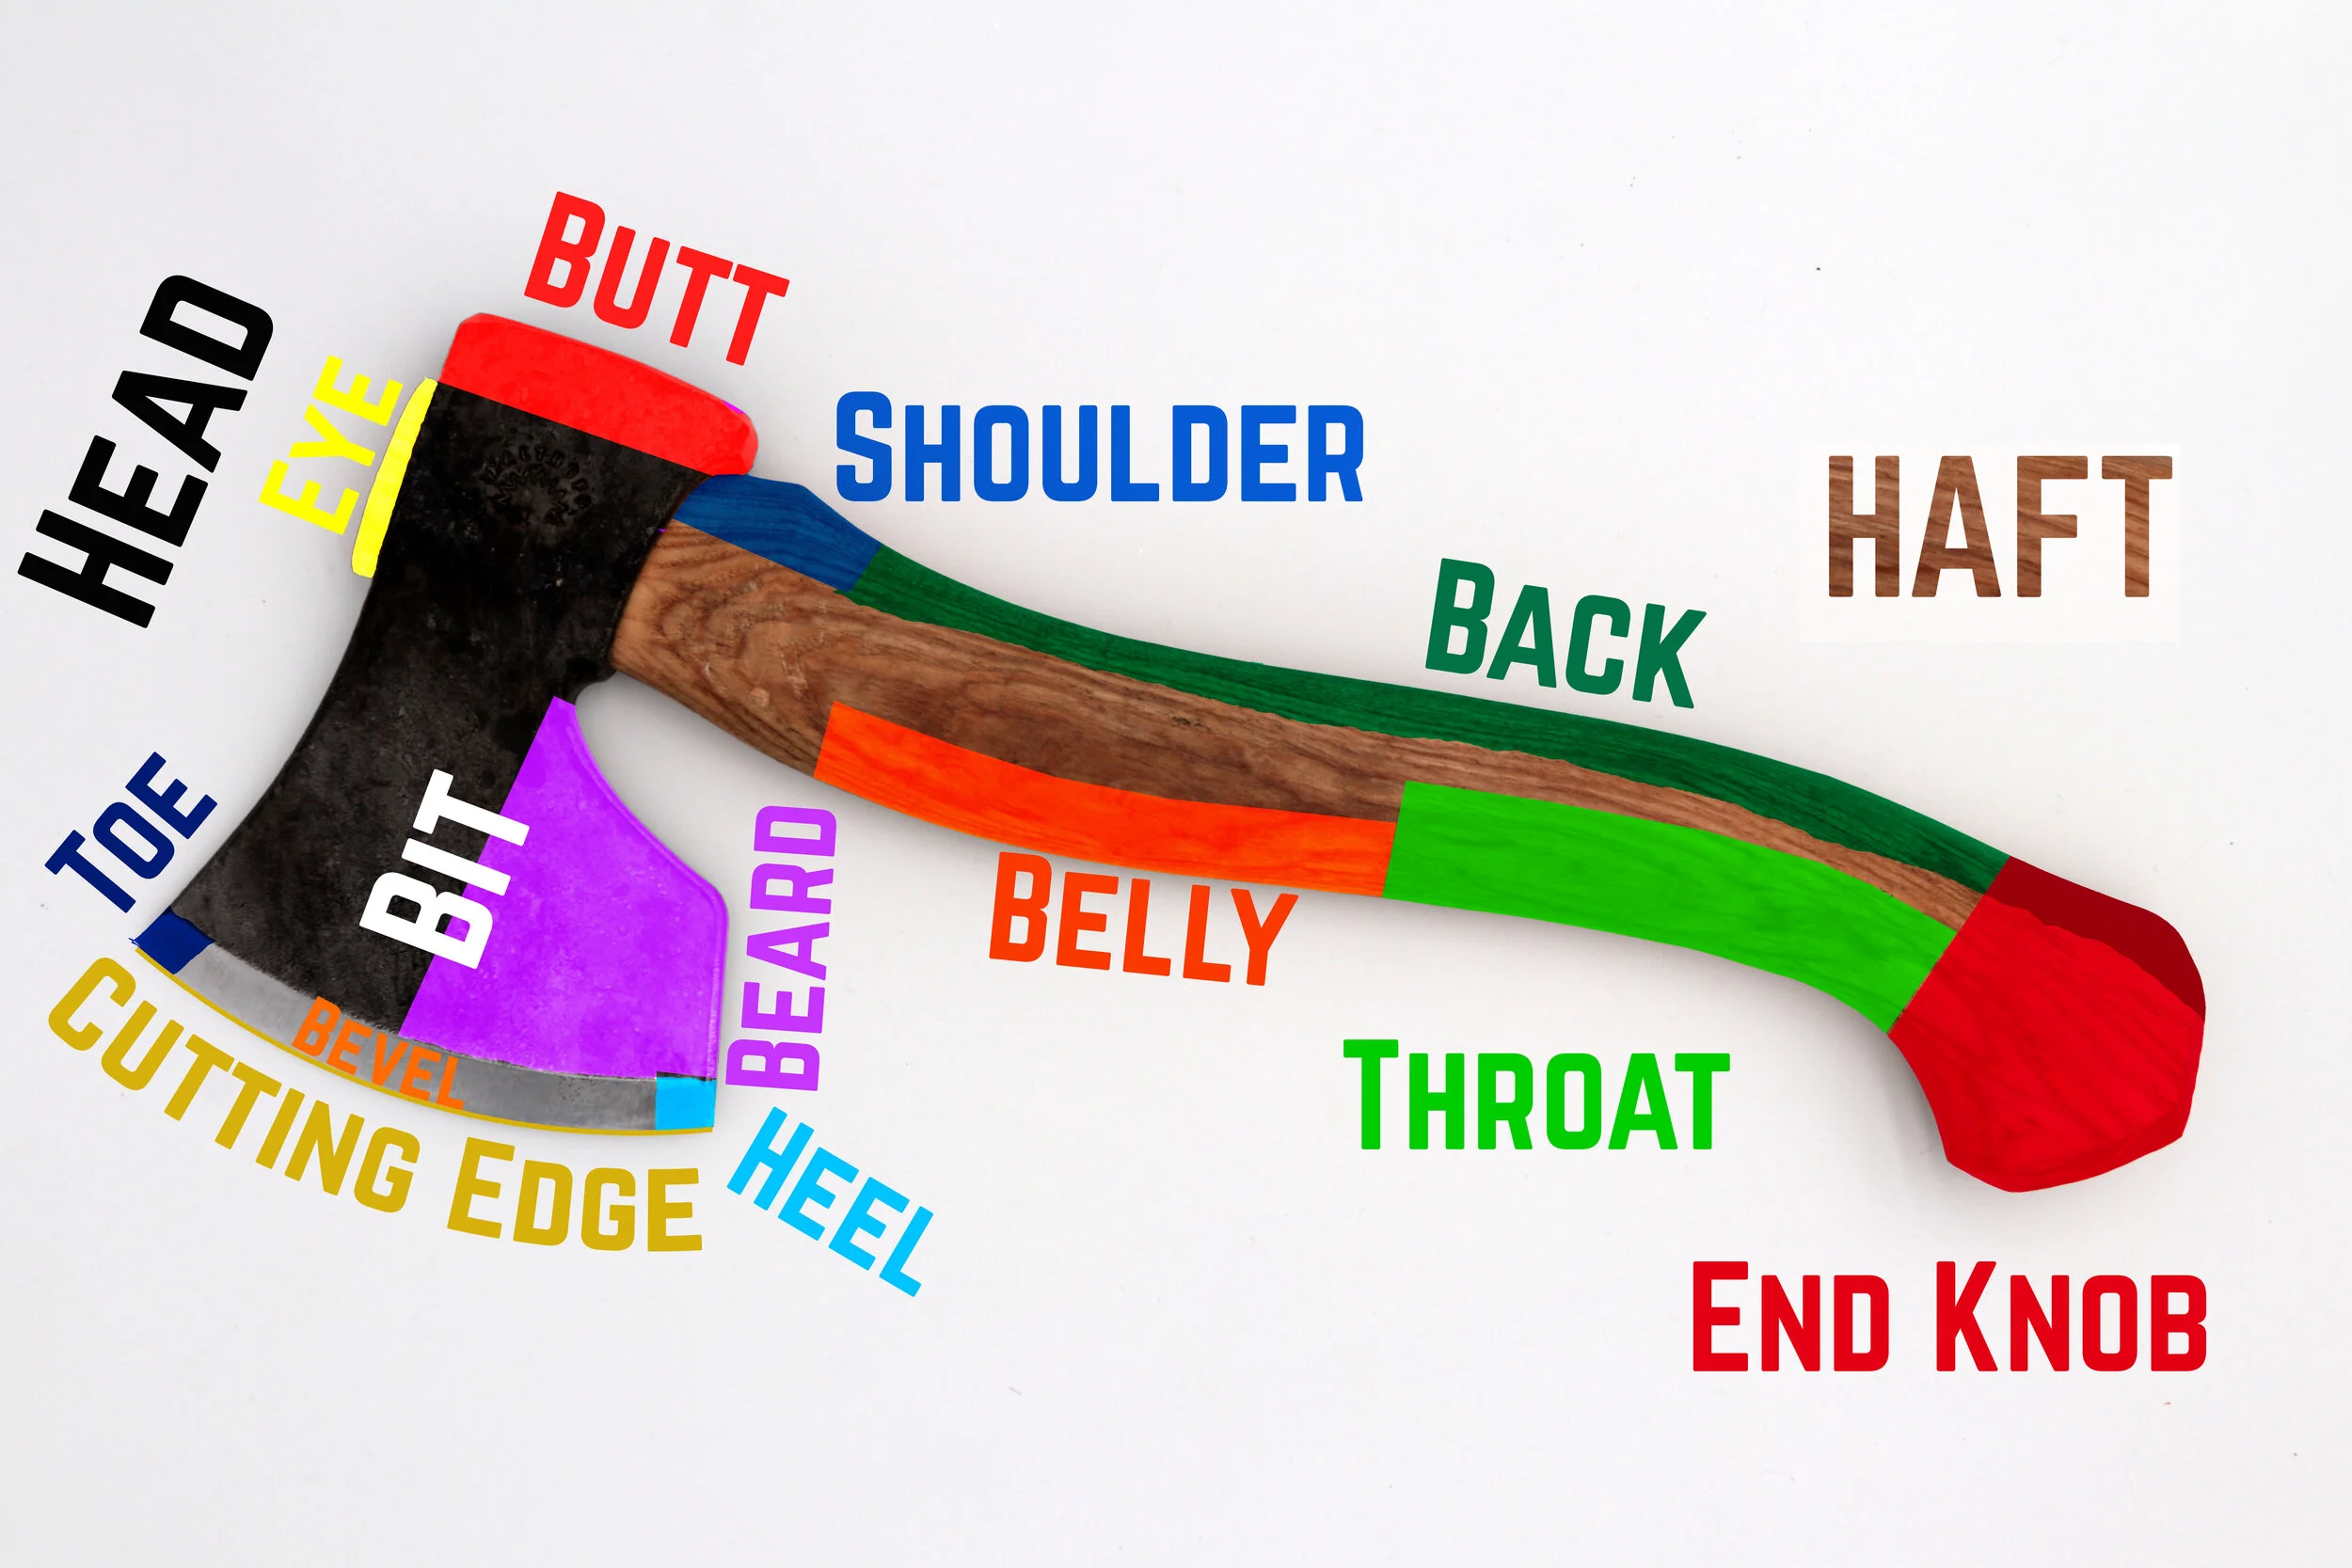
You can divide it into two main parts: the Head and the Haft.

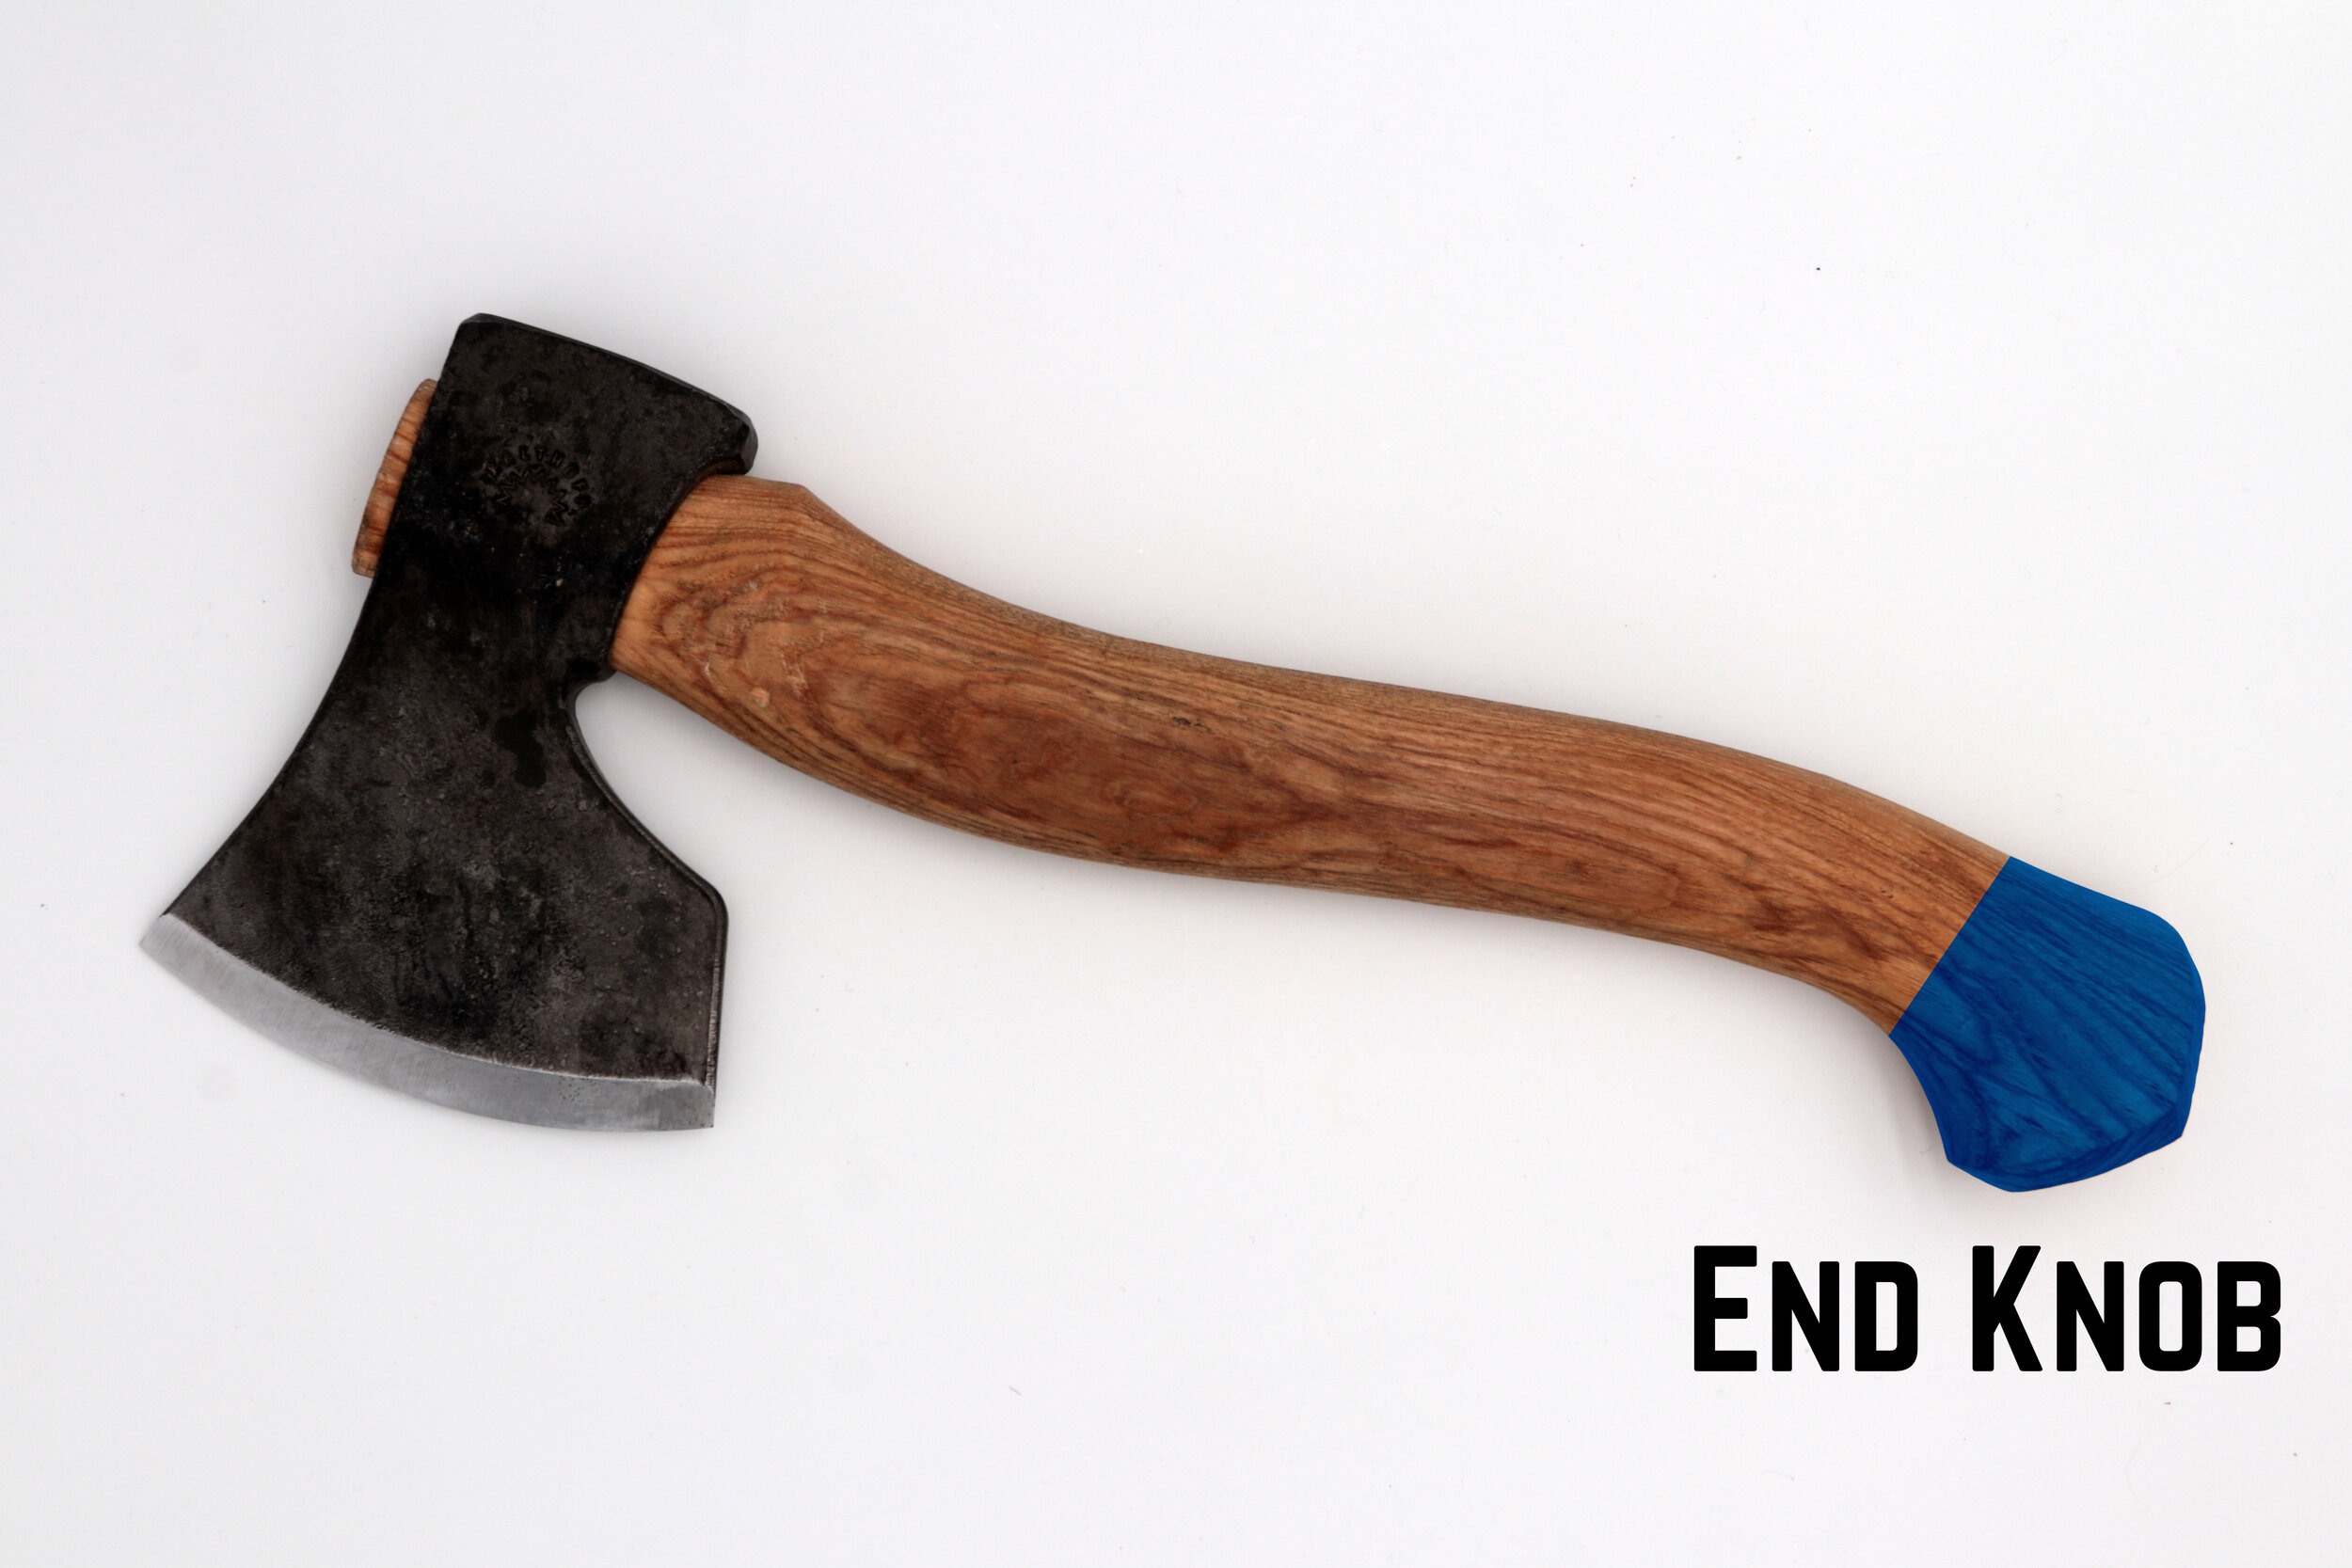
Starting at the bottom of the haft, or handle, we have the End Knob. The end knob provides extra material to help prevent the axe from slipping out of your grip.
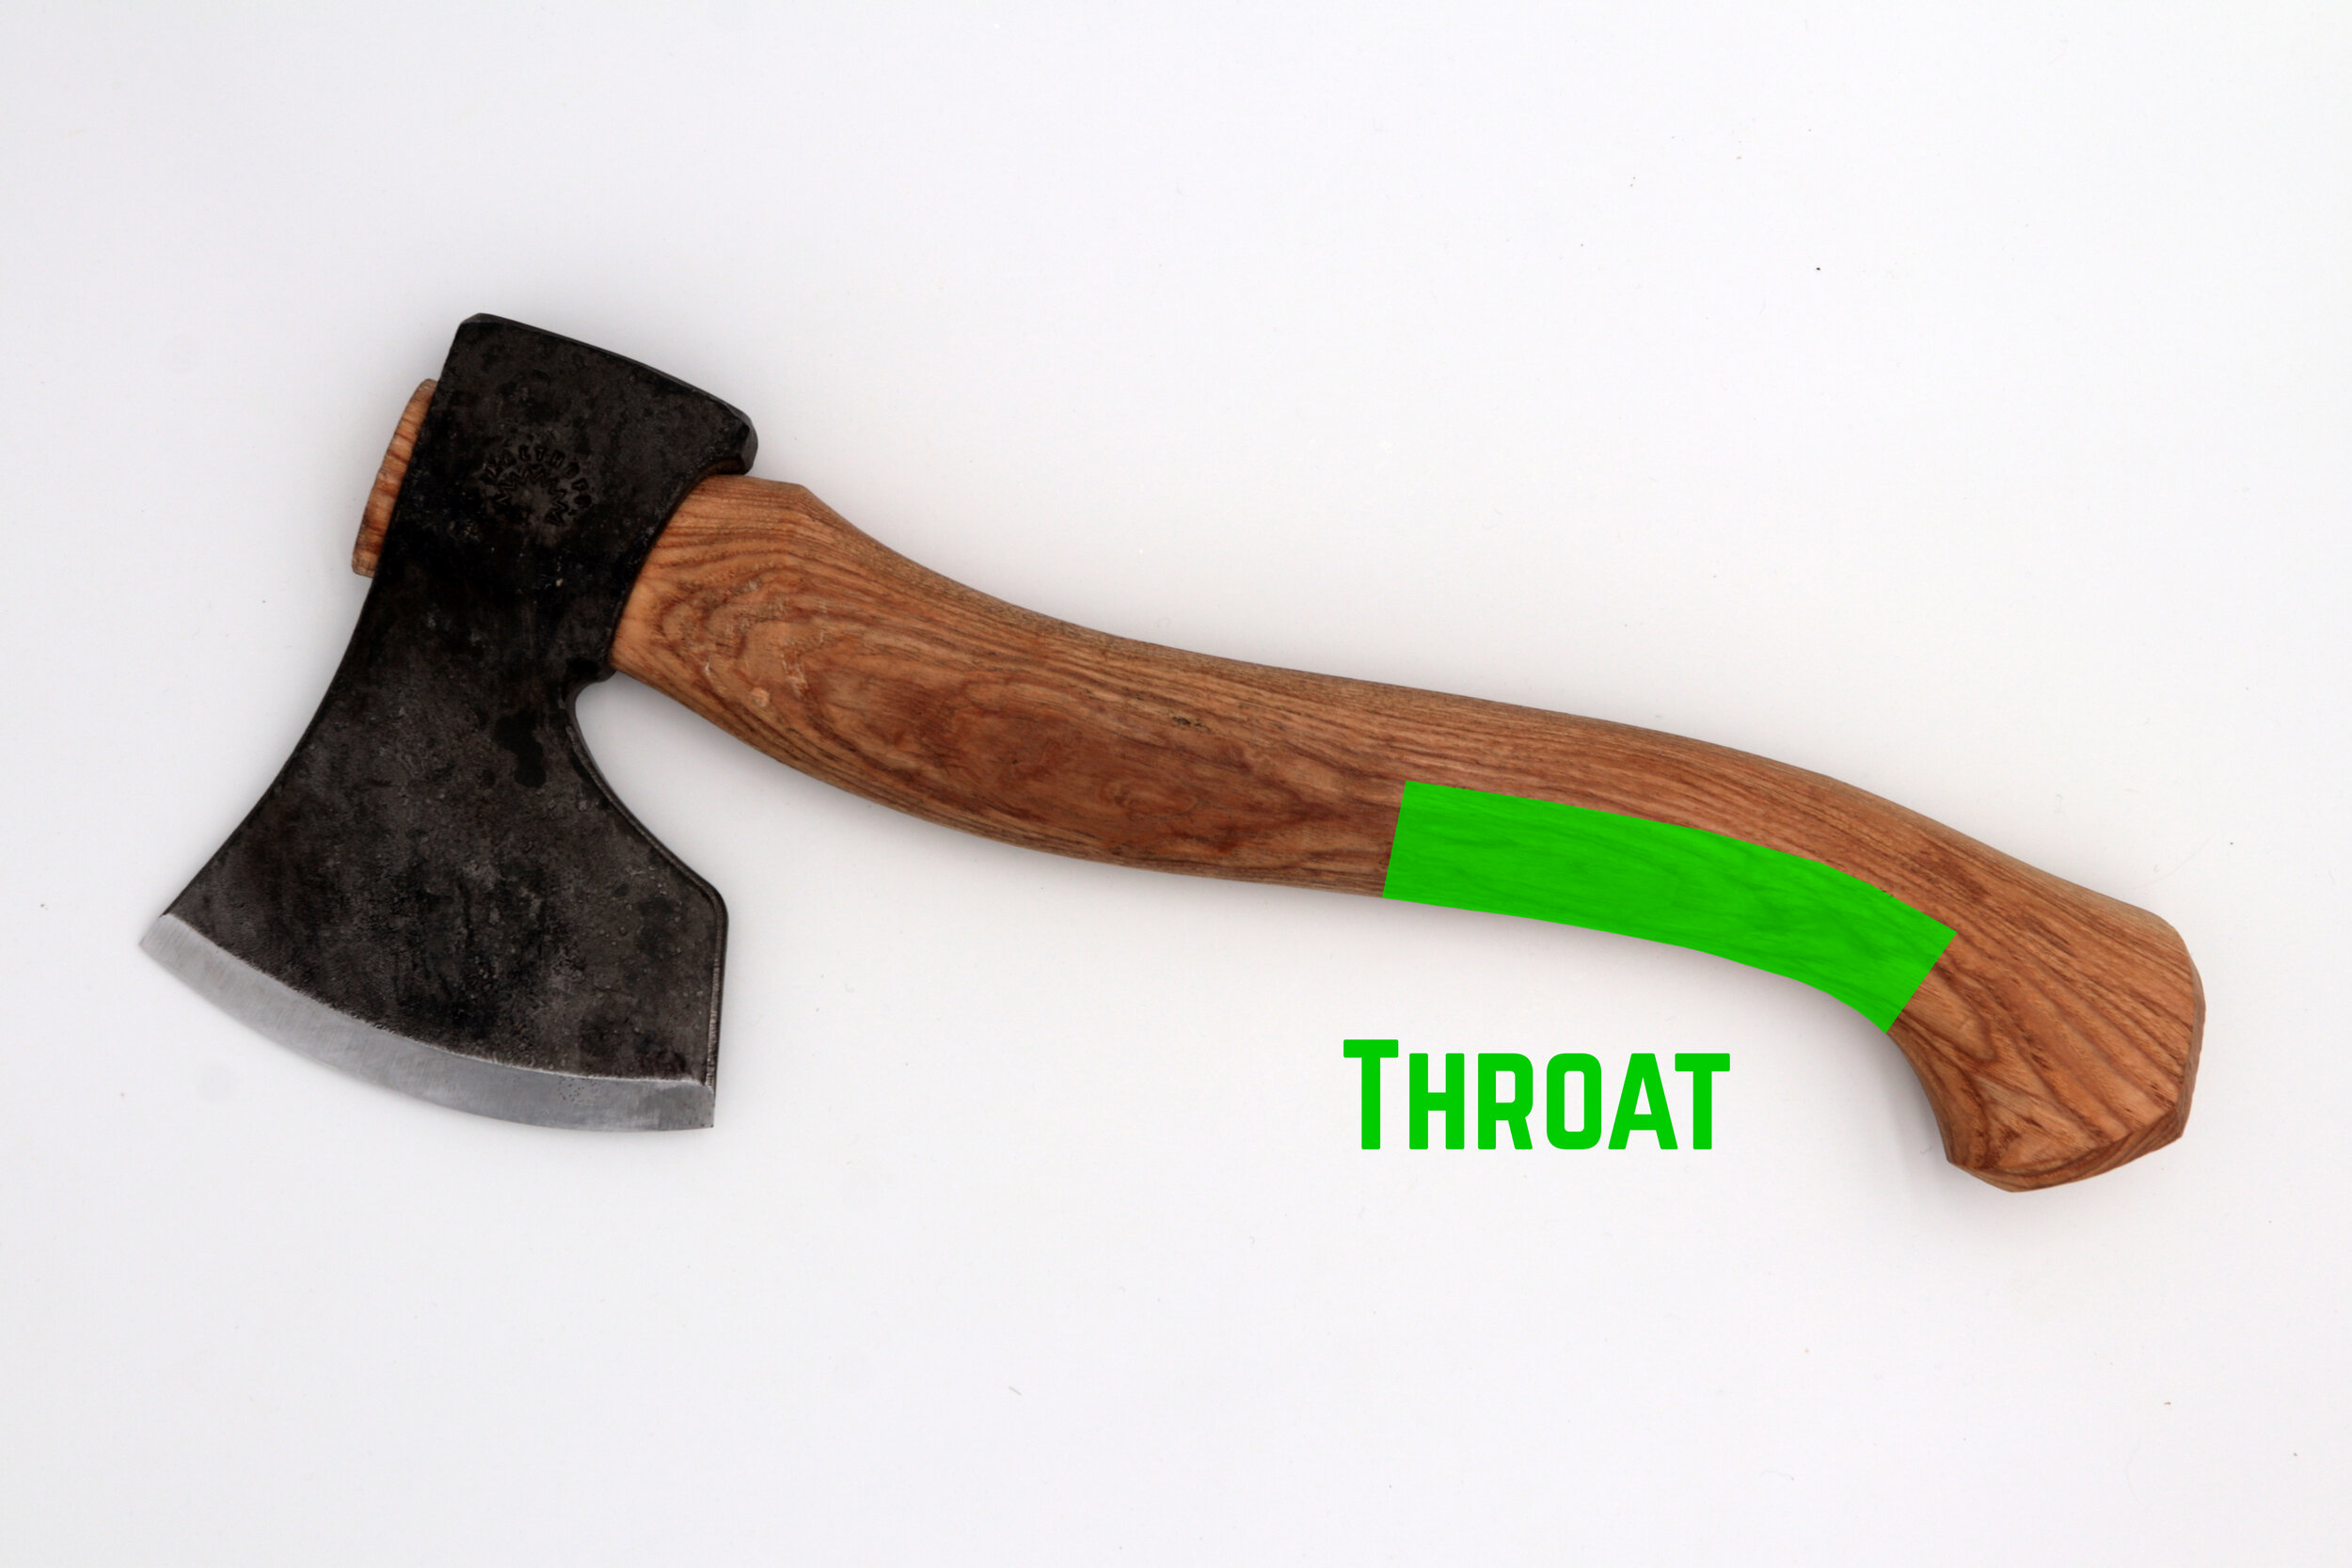
Above the end knob, the haft curves back. This is the Throat. Gripping the axe down here while swinging can provide a lot of power, but often at the expense of accuracy. It’s a good place to hold the axe when you have a lot of material to remove and your non-dominant hand is well away from the area being worked.
Above the Throat, the haft begins to curve in. This curve is the Belly of the handle. Around the belly is where I tend to grip the axe the most, as it provides a good balance of power and control.

Just before the haft goes into the head, there’s often a lump of wood that’s the Shoulder of the handle. Gripping on or just below the Shoulder gives most amount of control, but at the expense of power. Useful for when you’re working close to your non-dominant hand and when a high degree of accuracy is required.

The haft extends through the Head to the Eye. Looking down the top of the head you can see where the haft is wedged into the head. Pro tip, when selecting an axe, look for grain running in line with the axe head for maximum durability.

At the back of the head is the Poll, or Butt. While it may look similar to a hammer face, most Butts aren’t meant for pounding. Every now and again I’ll use a wooden mallet to strike the Butt for precision splitting of smaller pieces of wood. Too much pounding might start to deform the Eye, but that hasn’t happened to any of my axes. Yet.

The sides of the axe head are called the Cheeks. Sometimes the Cheek extends slightly down the handle. That part is the Lug. It’s there to increase the area of metal-to-wood contact to keep your Head attached to your Haft.
Moving along the Cheek, towards the business end of the Head, we have the Bit. Careful the Bit bites. I haven’t been badly bitten by the Bit, but blimey, bites from the Bit are bad.

This section of the Bit that extends down towards the handle is the Beard. Having a beard is always good. An advantage of a bearded axe that has space for your fingers means you can put your hand right behind the cutting edge. This lets us take advantage of our sense of proprioception. Proprioception is our sense of where our body is in relation to itself. It lets us touch our nose with our eyes closed. So, if your hand is right behind the cutting edge, you’ll have a much better intuitive sense of where the edge is, allowing for greater accuracy.

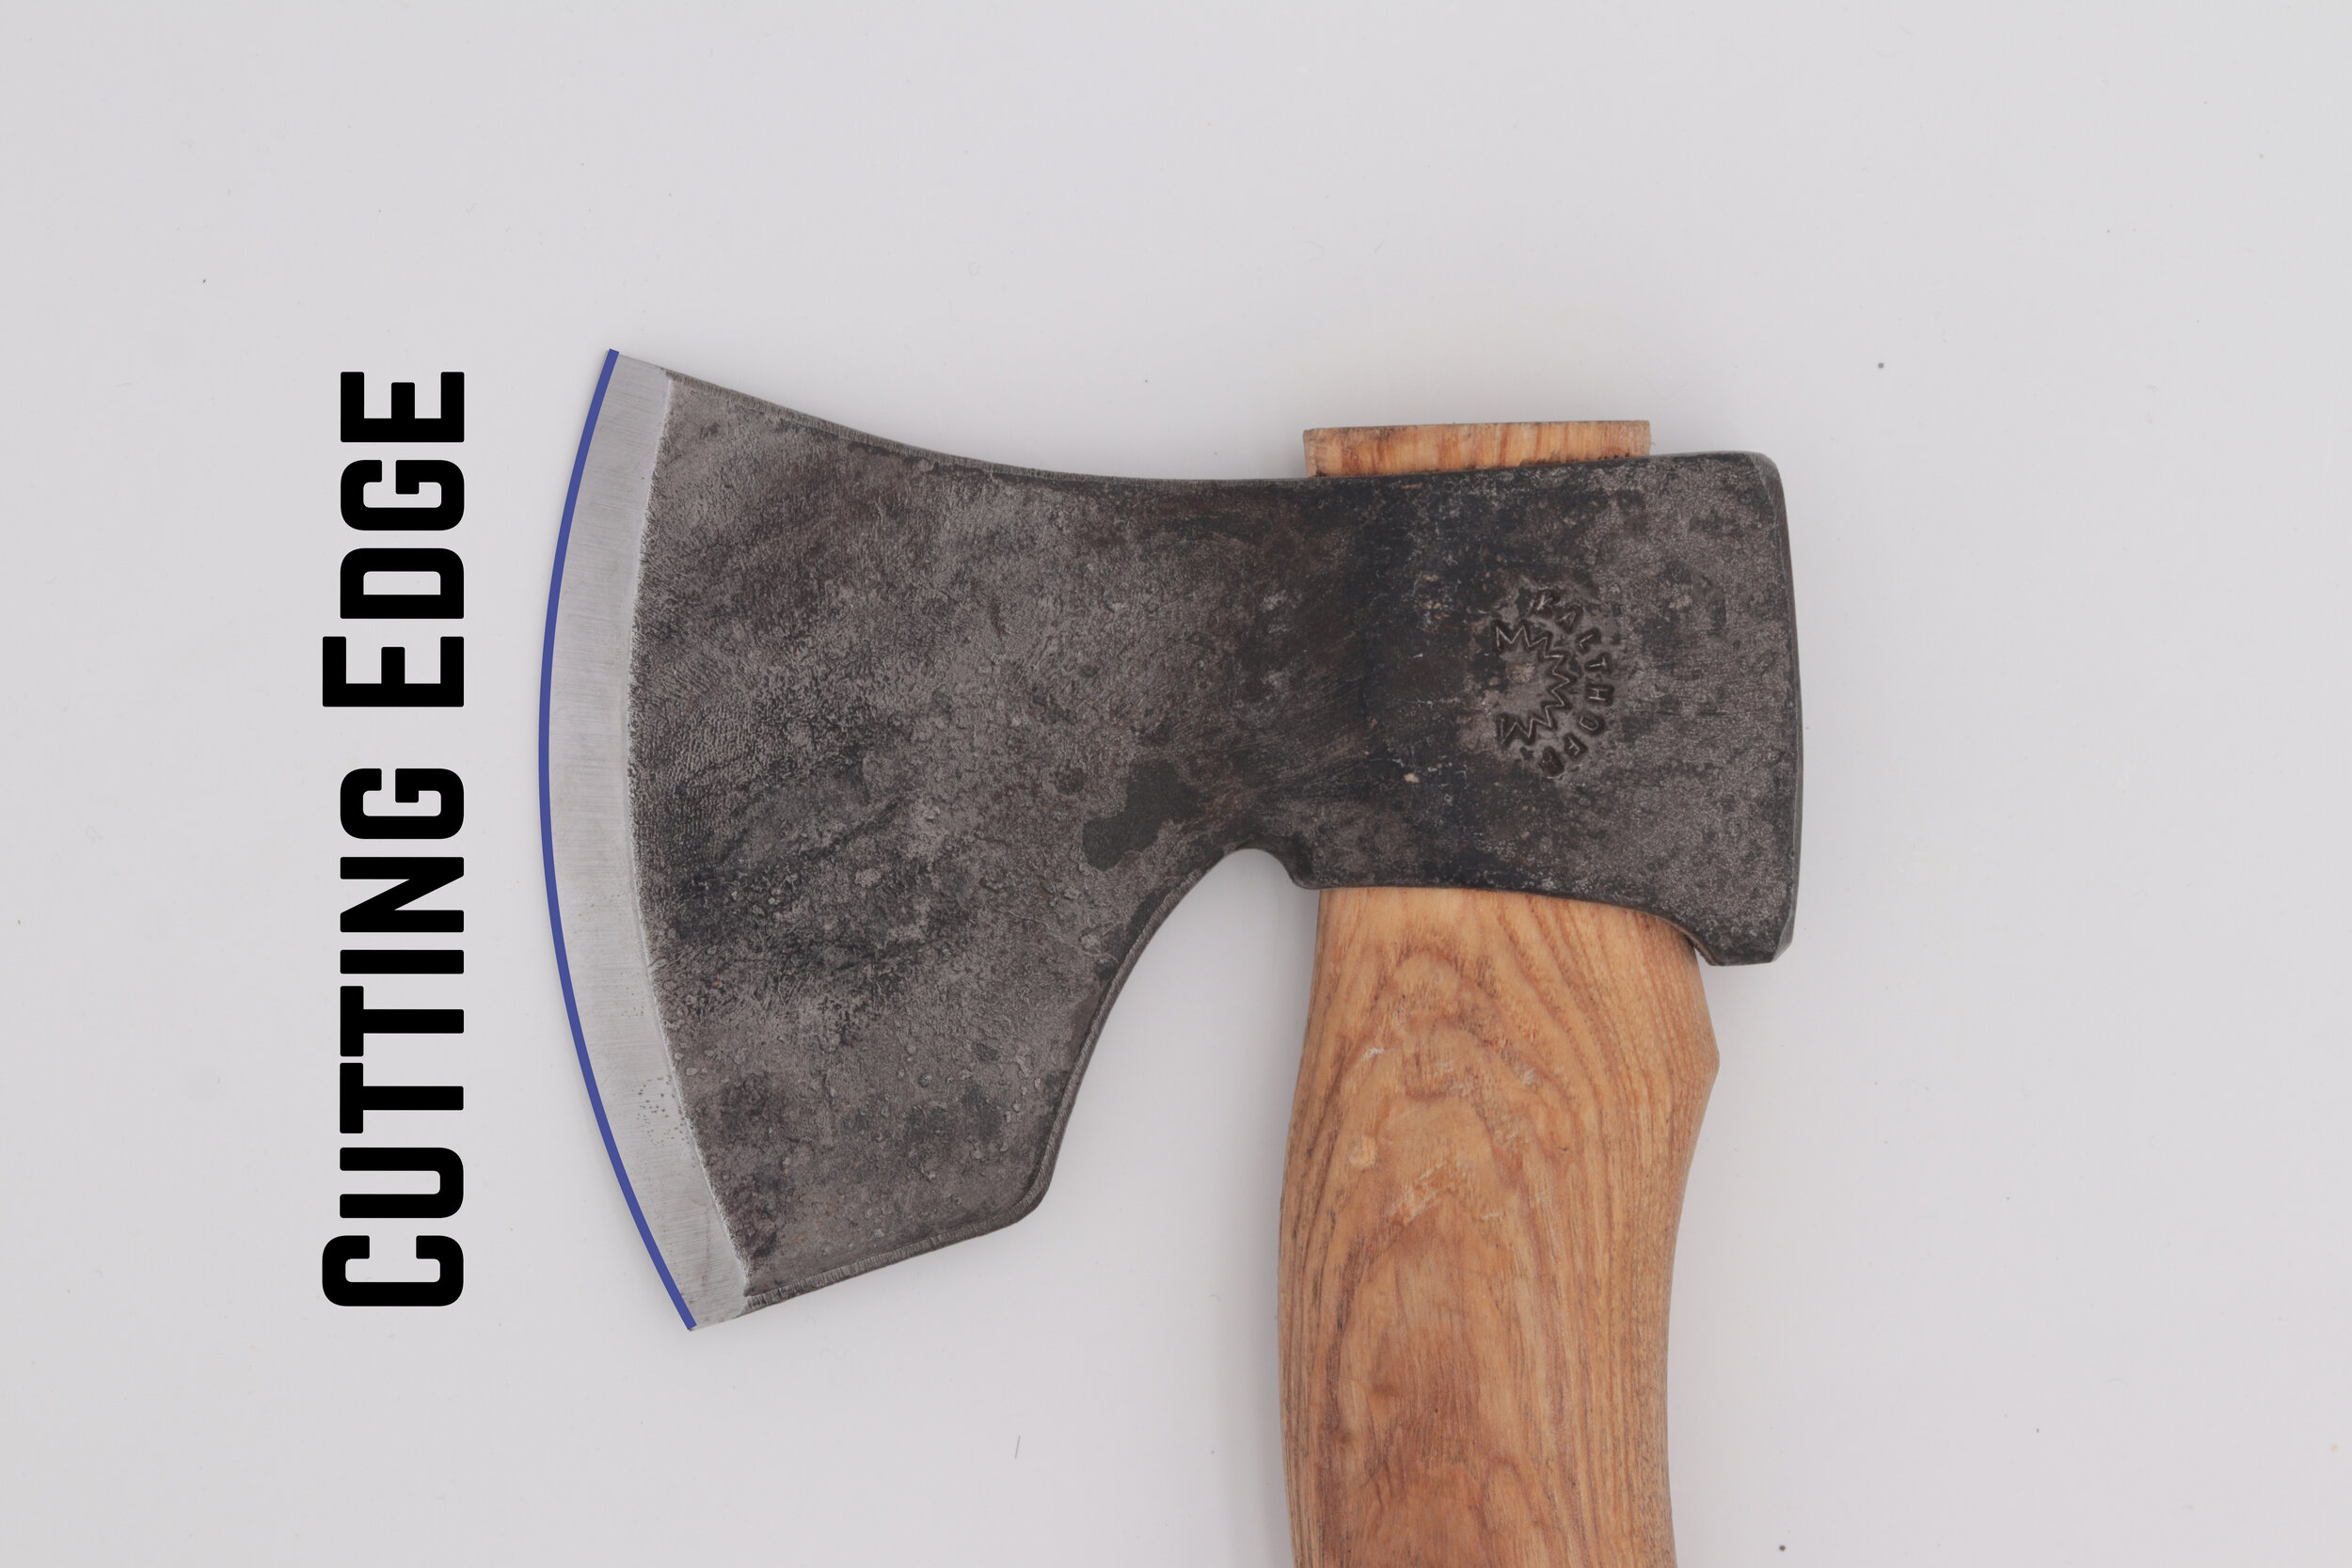
This shiny part is the Bevel. The Bevel ends in the Cutting Edge. The bevel is the part we focus on when sharpening the axe and the Cutting Edge is the .. edge … that cuts.

The bottom corner of the Bit is the Heel and the top corner is the Toe. I assume this is because most with most slicing strikes you want the cutting edge closer to the heel to strike first, rocking forward to ending the slice with the toe lifting out of the wood.

And to bring it all together in one psychedelic image:
So there you have it, the Anatomy of an axe. Are there any parts I missed out? If so, let me know in the comments.
If you enjoy the content of this site and find it to be useful, help me to be able to spend more time on similar articles by becoming a Patreon.